This article is for FMI Works users who have been given the permission of Reference Administrator
Overview
FMI Works allows custom fields to be created on work orders. These fields are typically used to capture information needed by your organisation that does not already appear on the work order. If desired, these fields can be made visible on the request form in the Requests Portal.
How to set up custom fields
From the Administrator module, select System > Additional Fields. This will open the Custom Labels page.
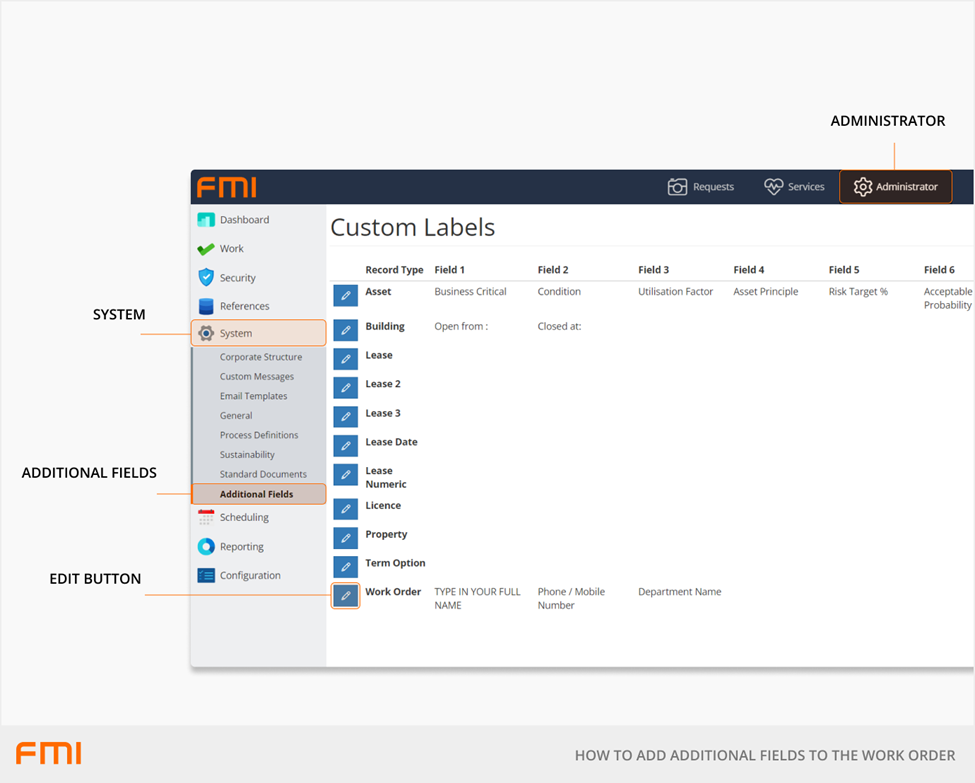
On the Custom Labels page, select the Edit button (pencil icon) next to the Work Order record type.
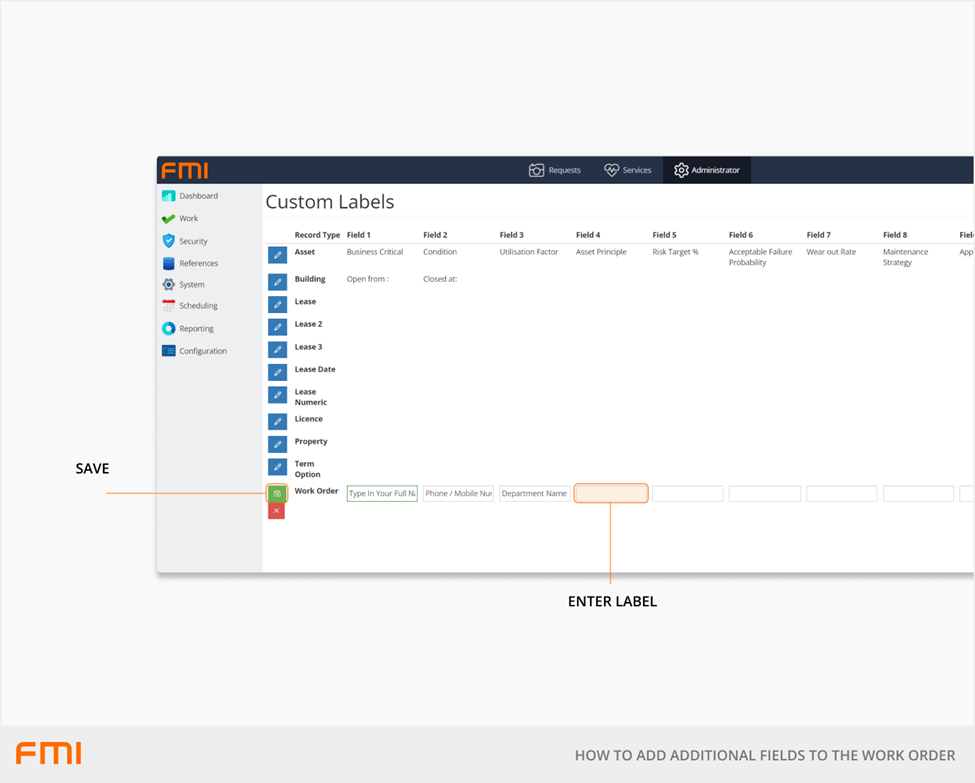
There are up to ten custom fields available. Enter your required label/s for each custom field. For example, 'Department Name' as shown in Field 3 above. Select the Save button once complete.
Note: Once the fields are in use, it is advisable not to change the label/heading names on each column. Changing the label/heading names will not move any data that has already been entered in the fields, and you will end up with data that does not match the label/heading. Instead, we recommend retaining any existing Custom Labels and using the next available label field. In the example above, you would retain Fields 1 to 3, and add the new label/heading to Field 4.
How to use custom fields
Once custom fields have been set up, there are two options to utilise them:
- Enter information directly on the work order.
- Display fields in the Requests Portal.
Option 1: Custom fields on work orders
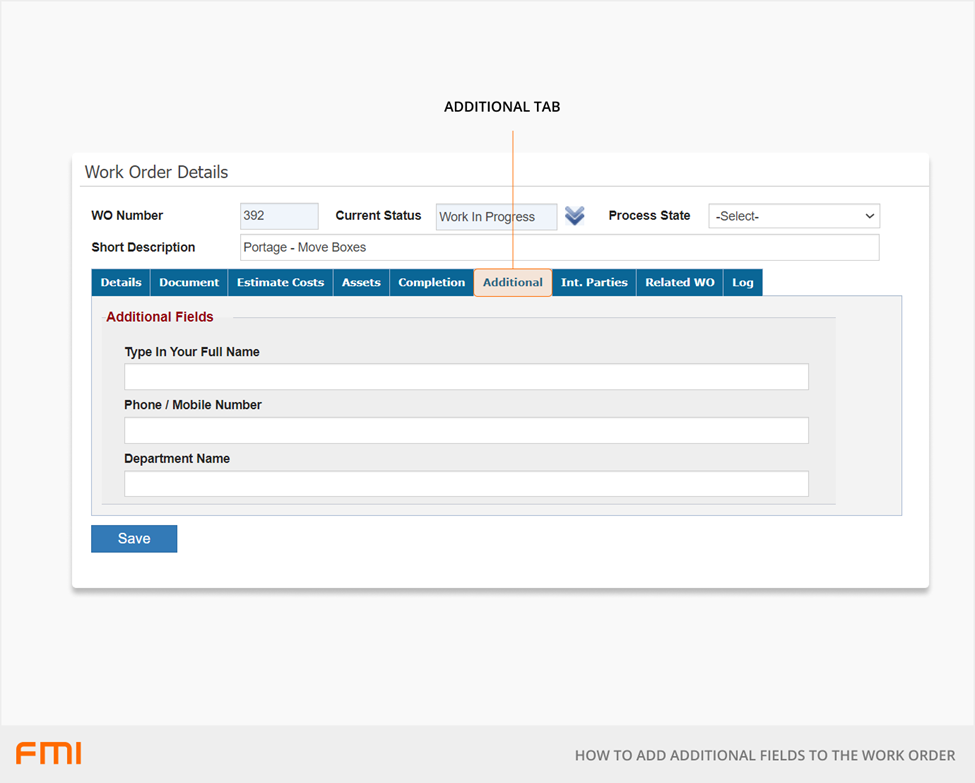
From the Services module, go to Work > Work Search. Search for and select the desired work order. The custom fields will be displayed on the Additional tab.
Option 2: Custom fields in the Request Portal
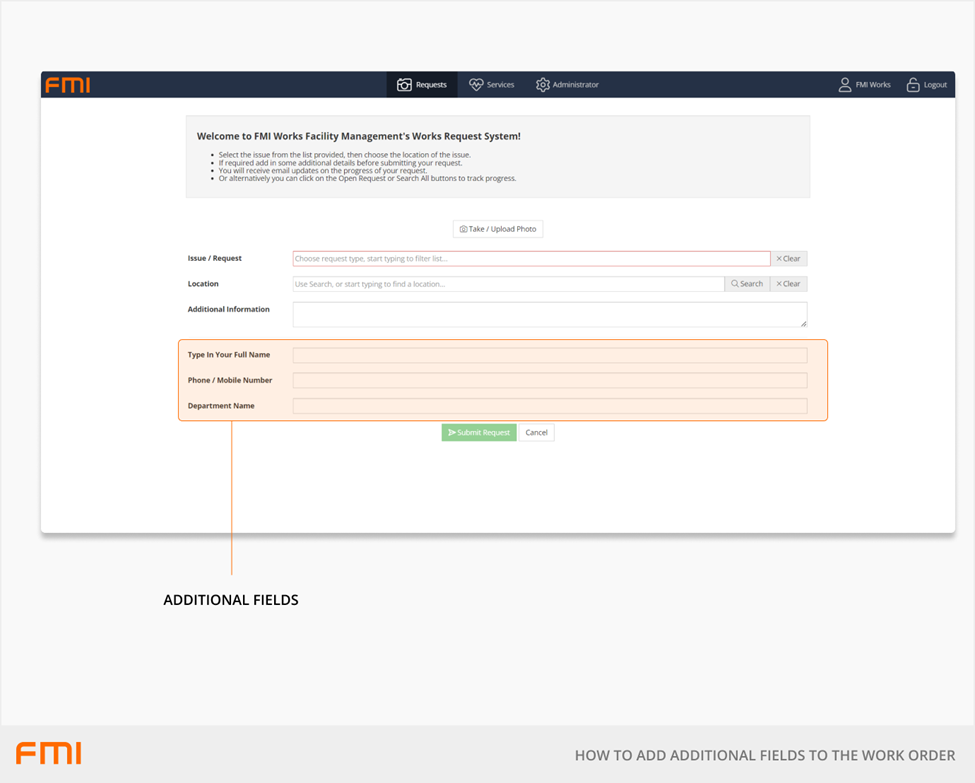
Custom fields can be made visible in the Request Portal, so that requesters can add additional information when raising a request. For example, asset number.
Note: custom fields are text only fields. They are not mandatory fields for the requester when raising a request.
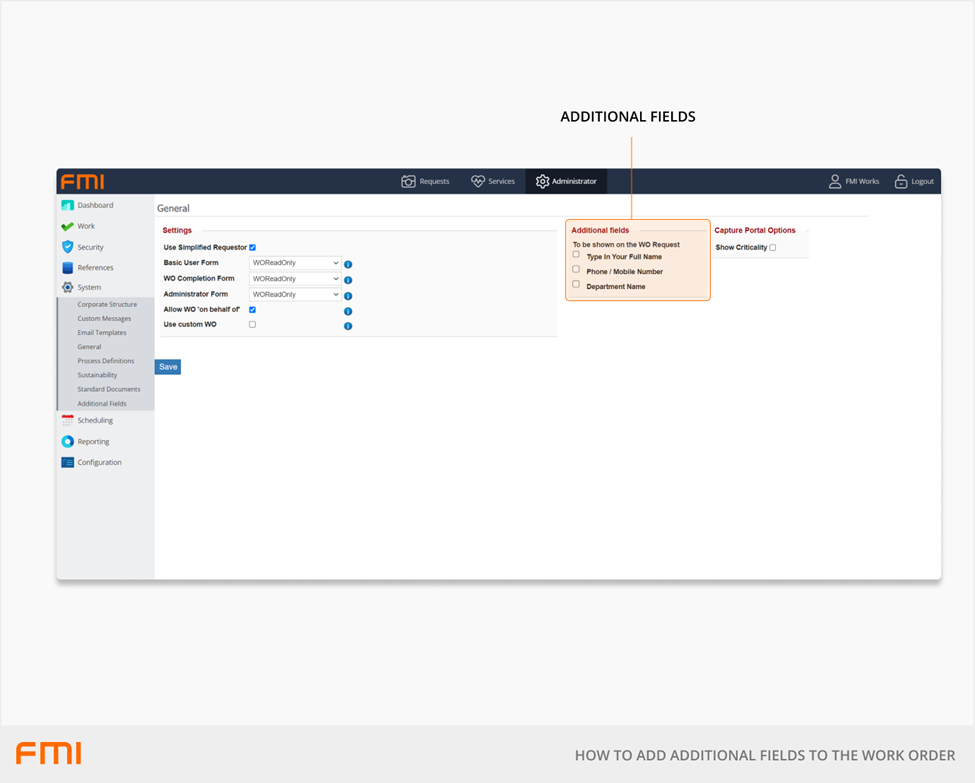
From the Administrator module, select Work > General.
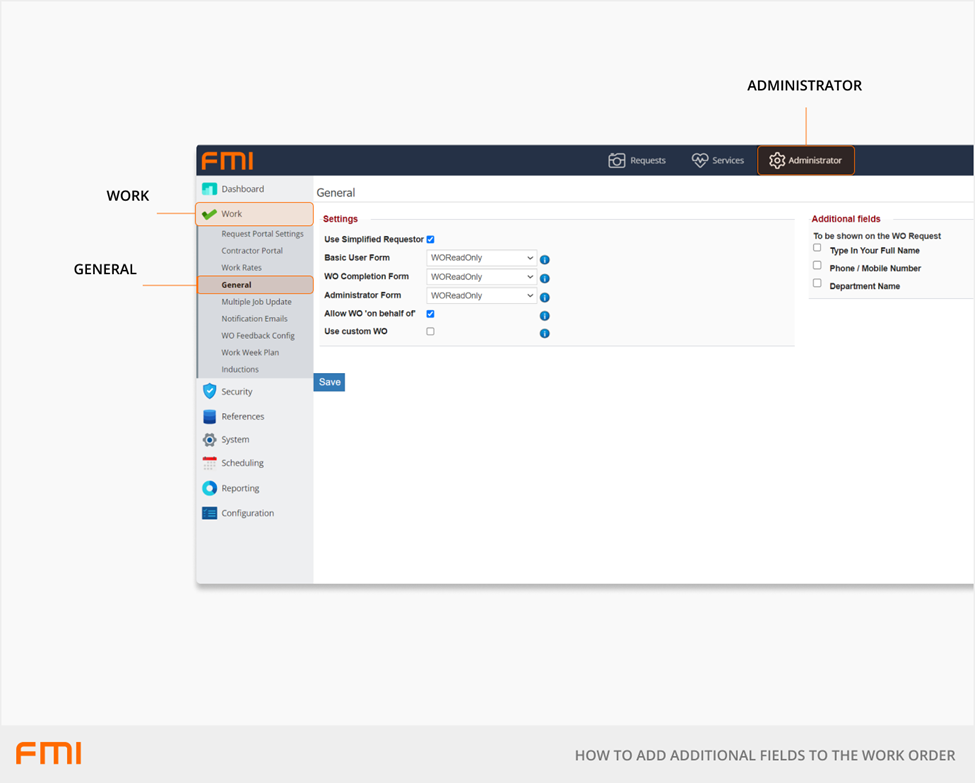
On the General page, the labels you created will appear under the Additional fields heading. Check the box of the labels you want to appear on the request form and select the Save button.
The additional fields will now appear on the New Request screen in the Request Portal. Users can enter the information along with the Issue / Request, Location, and Additional Information. The information requesters enter in these fields will appear in the Additional tab of the work order.