This article is for FMI Works users who have been given the permission of Works Coordinator or Works Manager
Overview
Knowing what planned maintenance work has been performed on an asset allows organisations to report on preventive and essential maintenance across its asset portfolio.
This is achieved in FMI Works by linking planned jobs to assets.
This article is a guide to adding assets to Planned Jobs after the Planned Job has been created.
Before you start
Before adding an asset to a planned job check the asset details below and update if required:
- Only assets with an ‘Active’ status can be added to Planned Jobs.
- The location on the Asset Details record must match the location details of the Planned Job. If the location details do not match, you will be unable to attach the asset/s to the Planned Job.
Getting started
Go to the Services module and select Work > Planned Jobs.
On the Planned Job List screen, use the filters to find and select the relevant Planned Job to which you need to attach the asset/s.
Select Search.
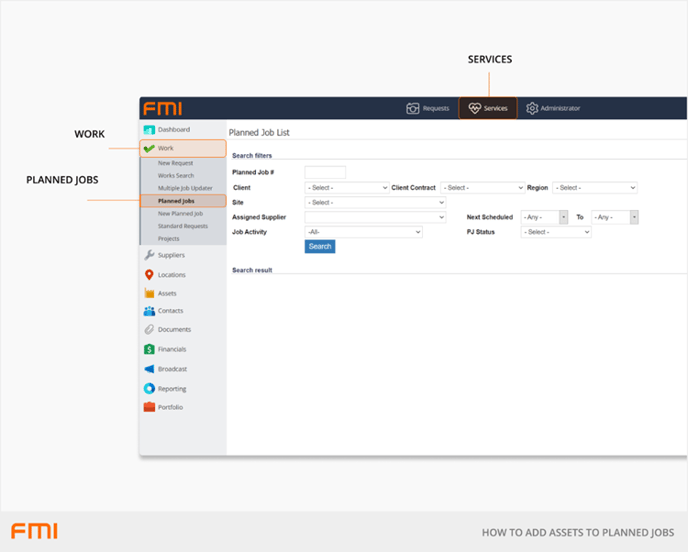
Locate and select the Planned Job by clicking on the relevant line.
This will open the Planned Job Details.
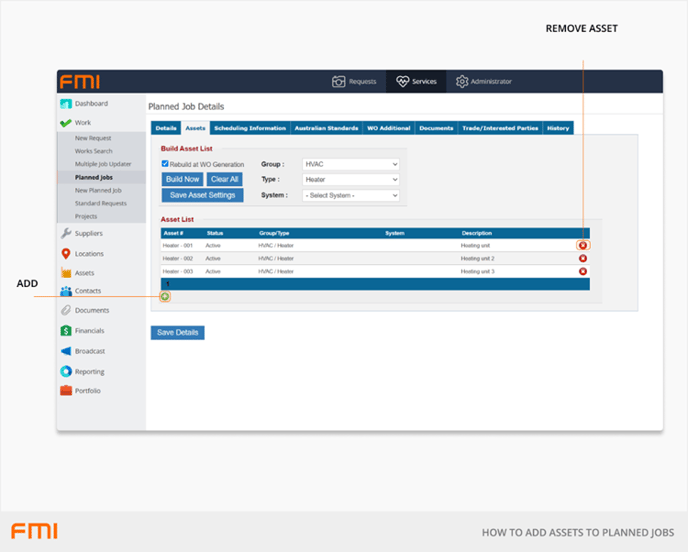
Select the Assets tab.

Adding assets
Choose the asset classification by selecting the relevant option from the Group and Type dropdown lists.
Optionally, you may also wish to select the relevant option from the System dropdown list. This is dependent on which asset/s need to be attached to the Planned Job.
Select Build Now.
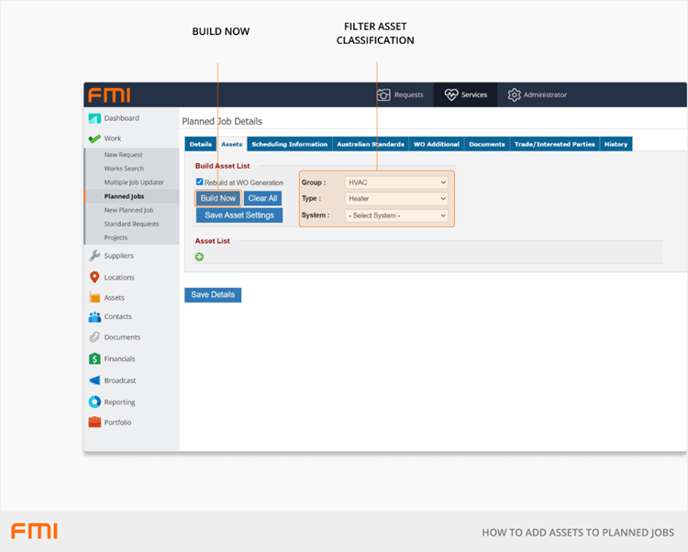
The Asset List will auto-populate the assets which match the:
- Selected Group, Type, or System; and
- Exact location selected on the Planned Job Details.
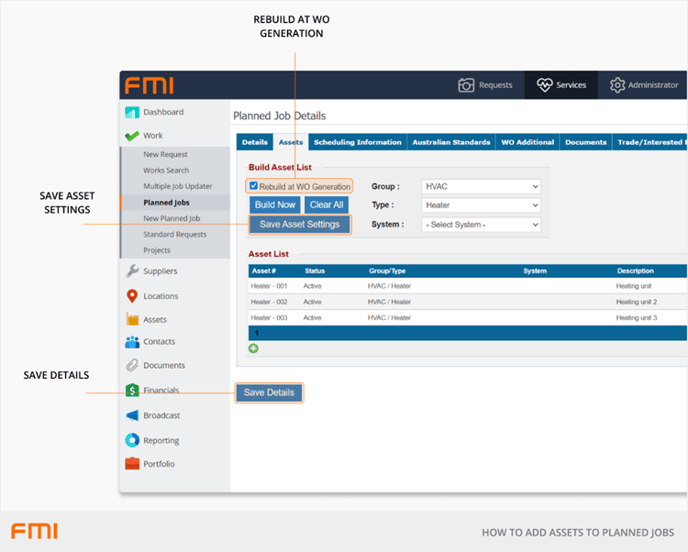
To ensure only active assets are applied each time a work order is generated from a Planned Job, select Rebuild at WO Generation.
Select Save Asset Settings.
Then select Save Details to complete the process.
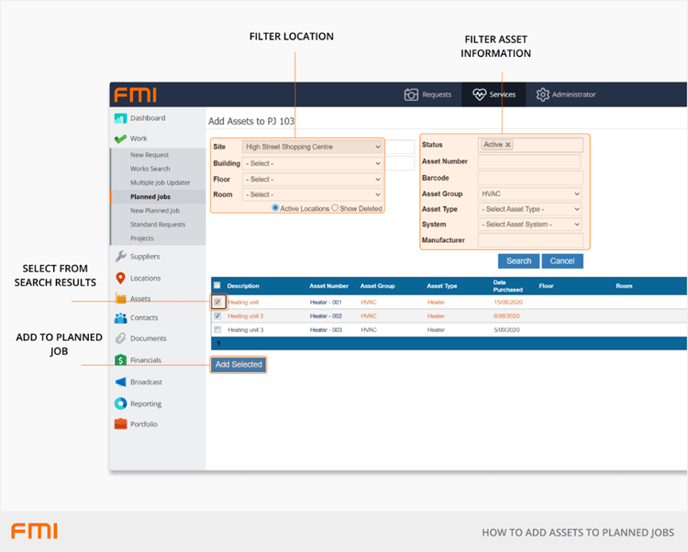
What if no assets are found?
If no assets are found, press the green + icon.
This will open the Add Assets to PJ screen.
Adjust the Building, Floor, Room to change the search criteria. Select Search.
Note: If the relevant asset does not appear in the search results, it may have been inadvertently added to the incorrect location. Go to Services > Assets to review the asset list and update the location if required, or adjust the Building, Floor, Room to change the search criteria, and select Search.
Scan the list provided and flag the asset/s that need to be added to the Planned Job.
Once flagged, select Add Selected.
If you accidentally add an incorrect asset to the Planned Job, click on the asset row and select the red x icon to remove it.
Select OK to proceed with the removal.
Once all desired assets are added, select Save Details.
When the Planned Job generates the work order, the assets will be visible on the work order:
- Within the Contractor Portal for external suppliers to view.
- Within the Requests Portal under Open Requests, for internal tradespeople to view.
- As an attachment, on the email notification which is sent to the work order assignee.