This article is for FMI Works users who have been given the permission of Works Coordinator or Works Manager
Overview
Knowing what work has been performed on an asset helps organisations make informed decisions about whether to repair or replace the asset. This is achieved in FMI Works by linking work orders to assets.
This article is a guide to adding assets to reactive work orders. To add assets to a work order generated by a planned job, see How to Add an Asset to a Planned Job.
Single assets vs multiple assets
Usually, a single asset is added to a reactive work order however, there may be instances where multiple assets need to be added.
For example, if all HVAC systems on a floor have failed their routine planned servicing, you would need to create a reactive ad-hoc work order to ensure these assets are fixed or decommissioned. In this scenario, we recommend creating a Related Work order against the initial planned job work order. Refer to How to Use Related Work Orders.
Getting started
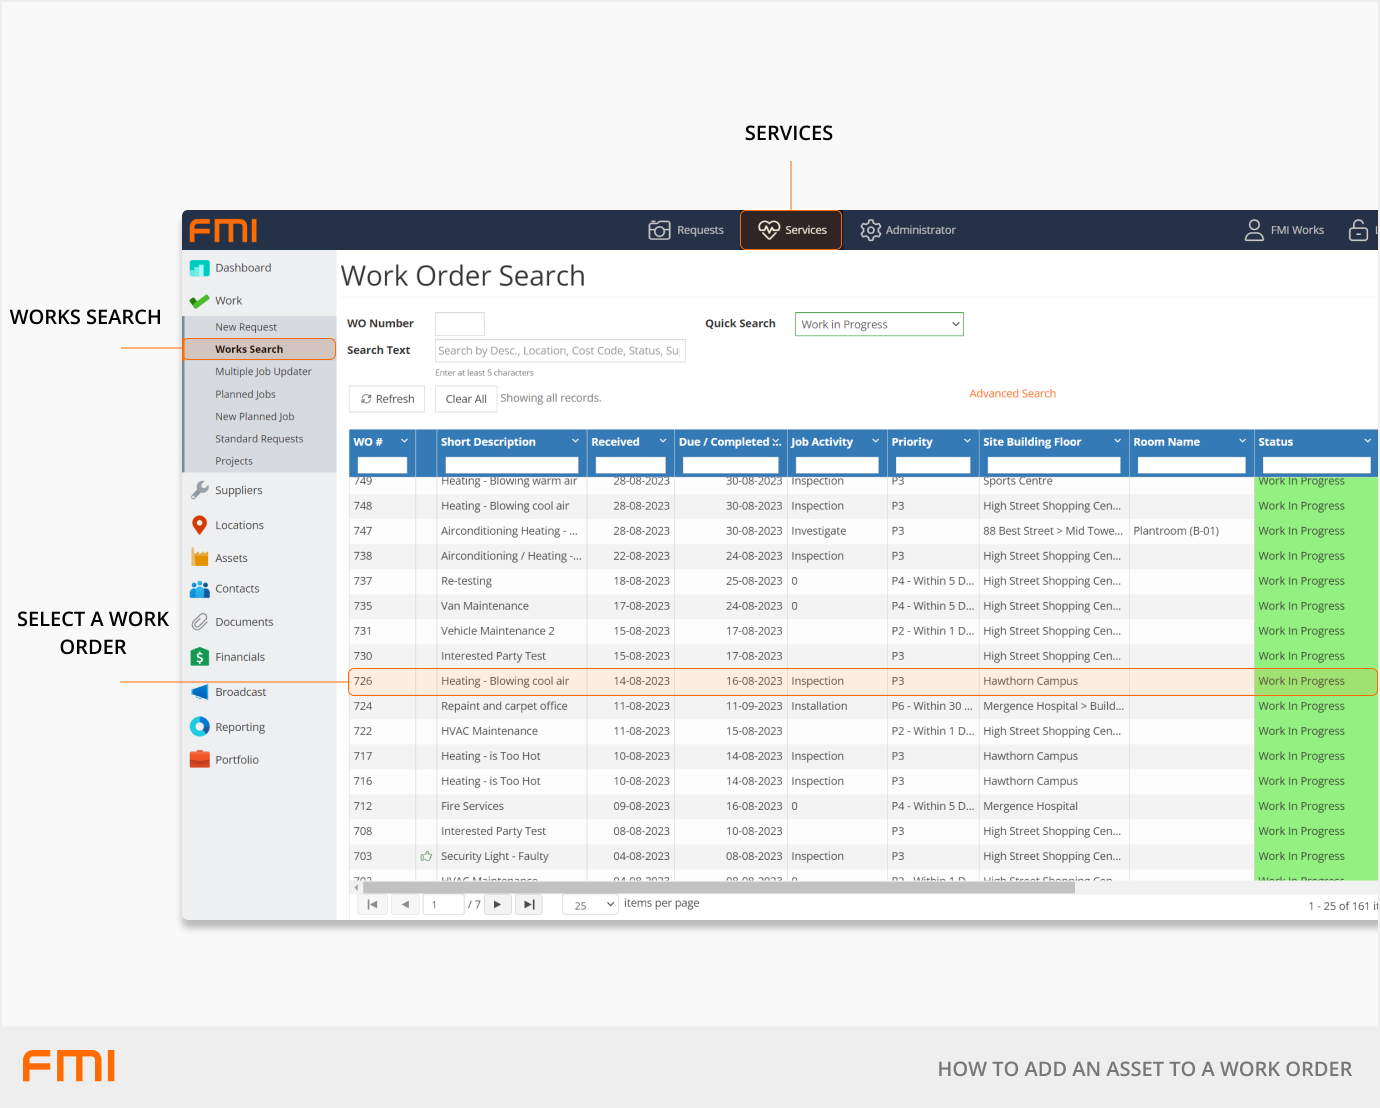
Go to the Services module and select Work > Works Search.
Use the filters on the Work Order Search page to find and select the relevant reactive work order.
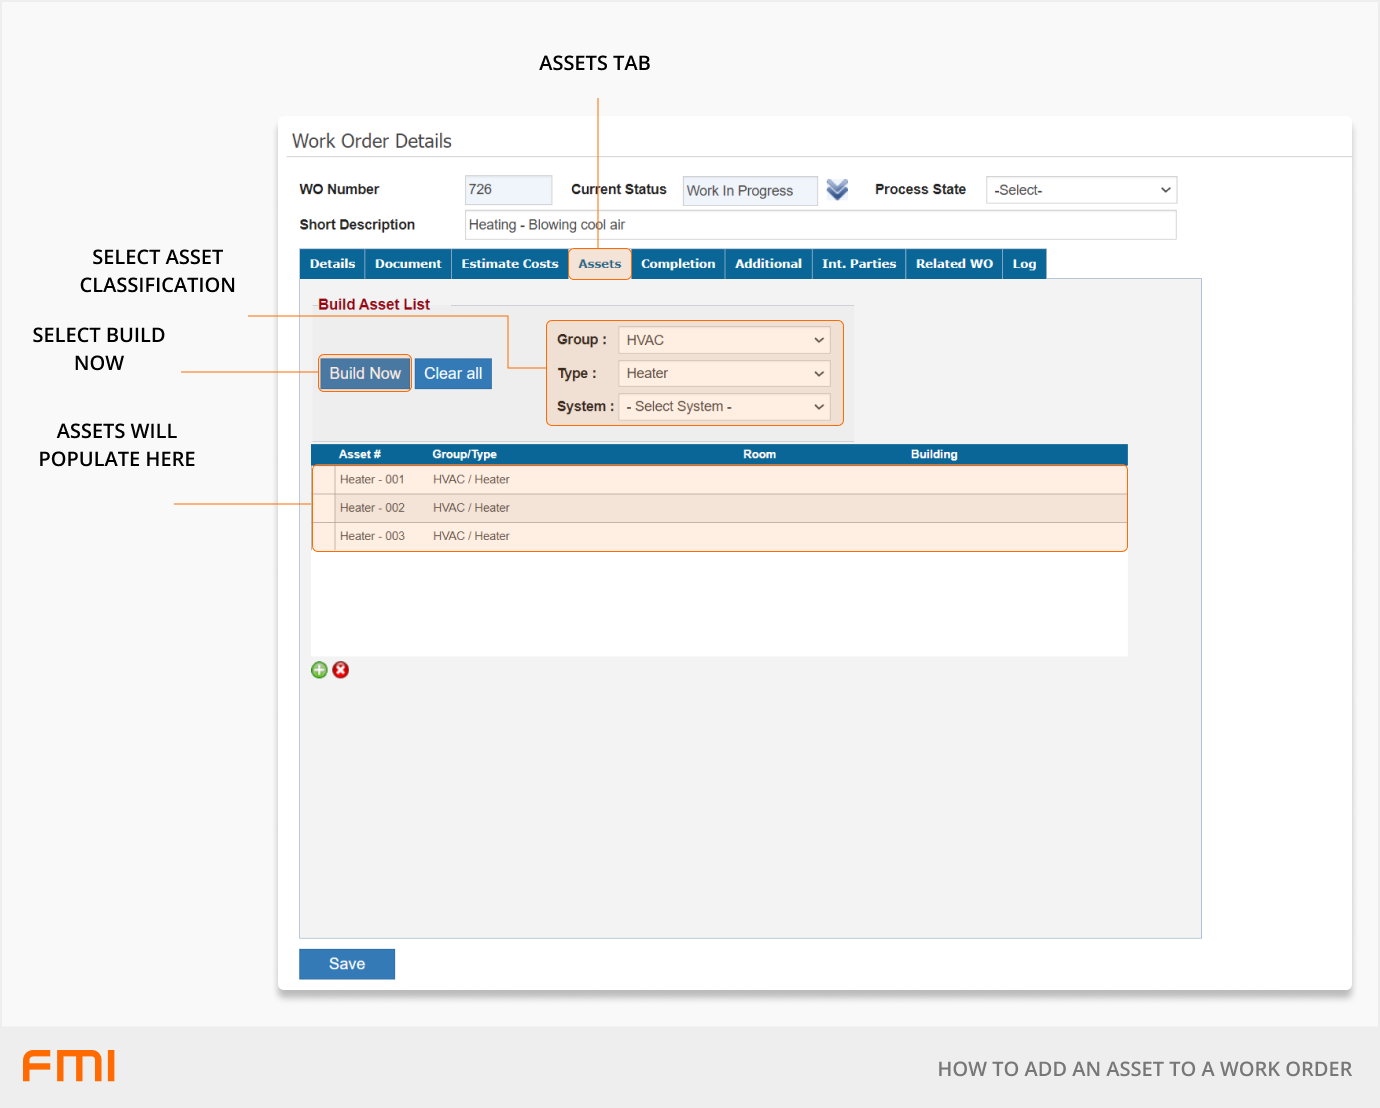
On the Work Order Details page, select the Assets tab.
Adding assets
Select the applicable asset classification by choosing asset Group, Type, or System. This is dependent on which asset/s need to be attached to the work order.
Select Build Now. It will either:
- Auto-populate the asset/s list that exist within the selected Group, Type, or System which exactly matches the location on the Work Order Details tab; or
- Return no asset results.
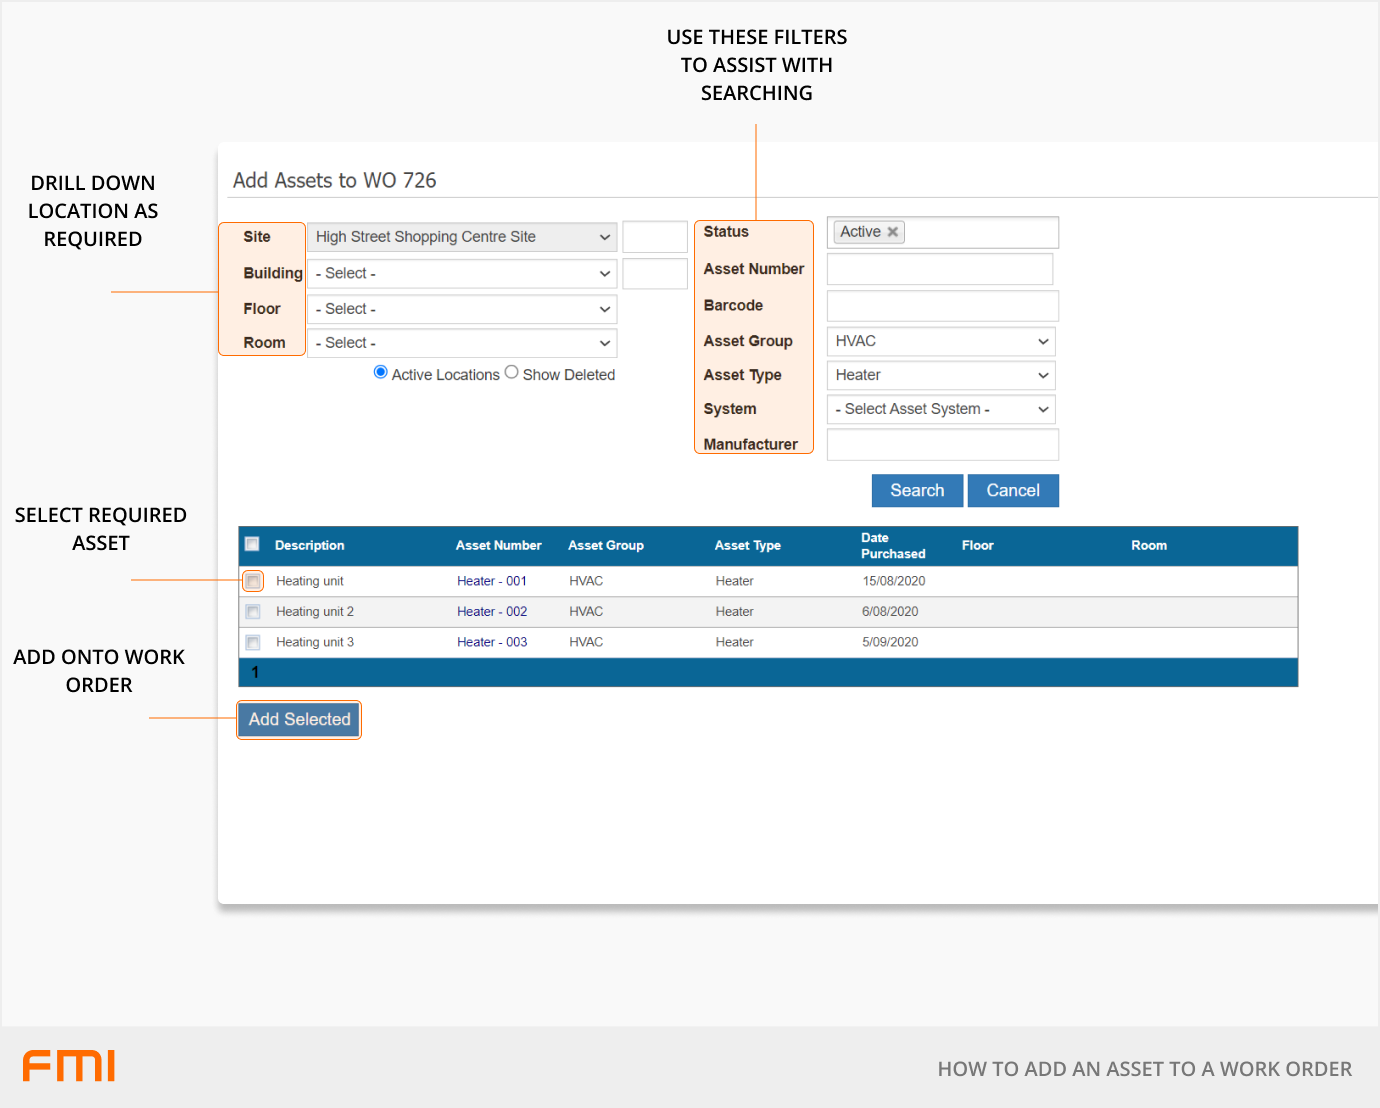
What if no assets are found?
If no assets are returned, press the green + icon.
On the Add Assets to WO screen, adjust the Building, Floor, Room to adjust the search criteria. Select Search.
Note: If the relevant asset does not appear in the search results, it may have been inadvertently added to the incorrect location. Go to Services > Assets to review the asset list and update the location if required,or adjust the Building, Floor, Room to change the search criteria, and select Search.
Scan the list provided and flag the asset/s that need to be added to the work order. Once flagged, select Add Selected.
If you accidentally add an incorrect asset to the work order, click on the asset row and select the red x icon to remove. Select OK to proceed with the removal.
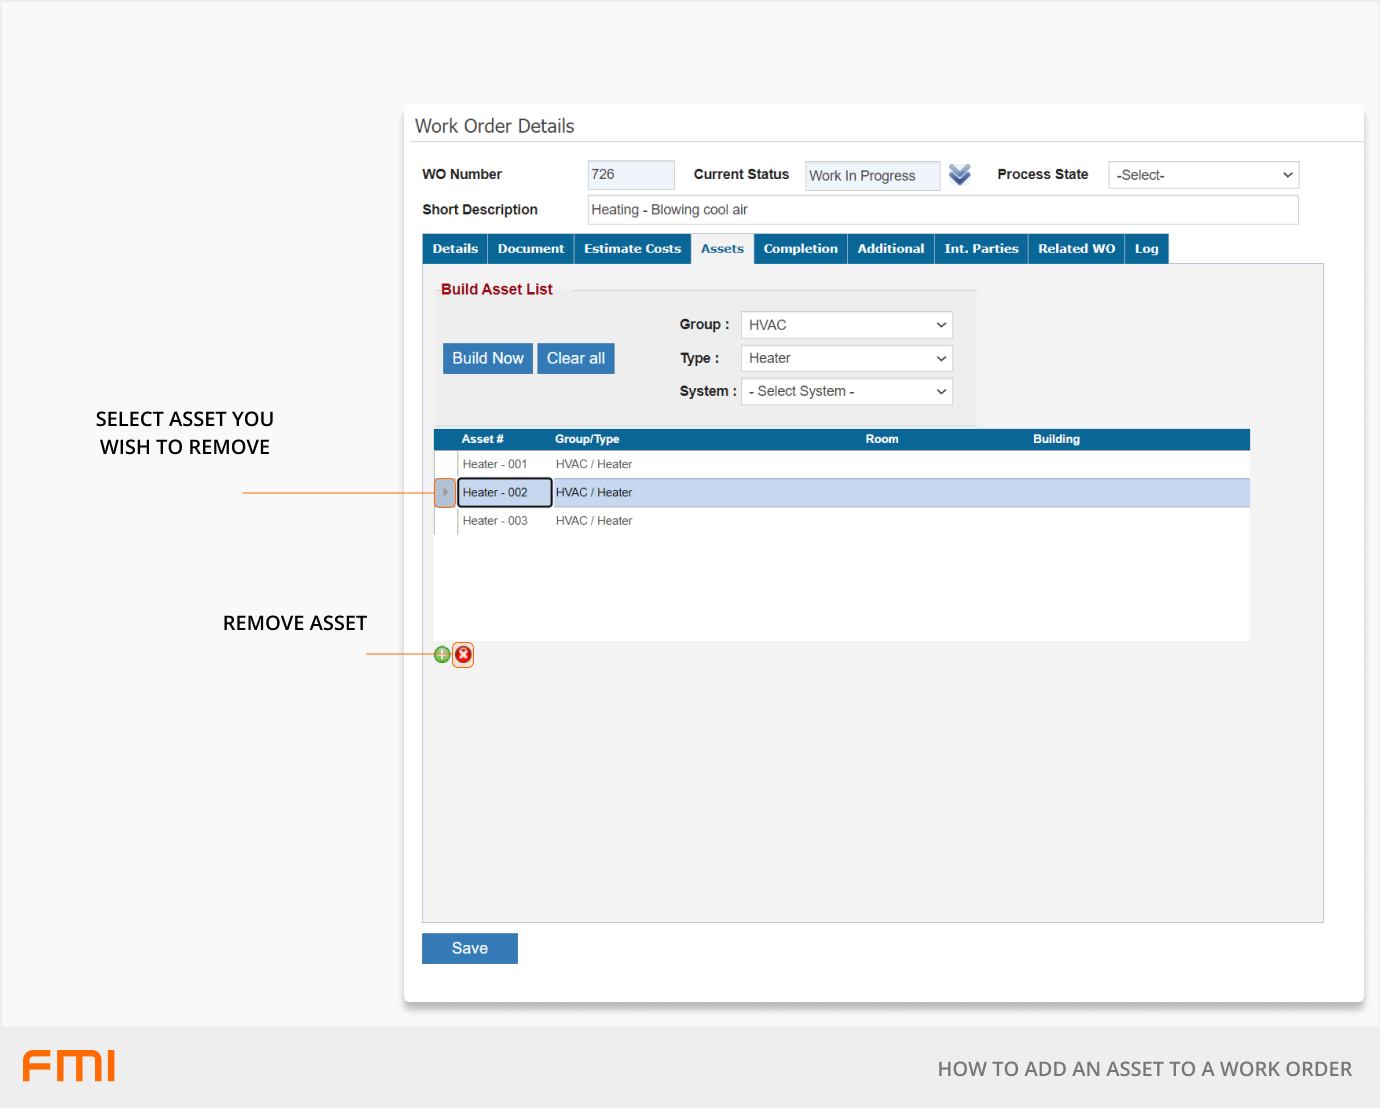
Select the Save button once all desired assets are added.
Once the Current Status reaches ‘Work in Progress’, the asset will be visible on the work order:
- Within the Contractor Portal for external suppliers to view.
- In the Requests Portal, under Open Requests, for internal tradespeople to view.
- As an attachment, on the email notification which is sent to the work order assignee.
Tip: After selecting the location in the work order Assets tab, we recommend checking the location on the work order Details tab and updating the location to match the Asset information.