This article is for FMI Works users who have been given the role of Works Coordinator, Manager, or System Administrator
Overview
Location Documents are a useful way of automatically sending important information, such as a site map, to your work order recipients.
Where to start
Once your locations are set up, you can start adding Location Documents. See How to Get Started with Location Data.
Go to the Services module and select Locations > Location Summary.
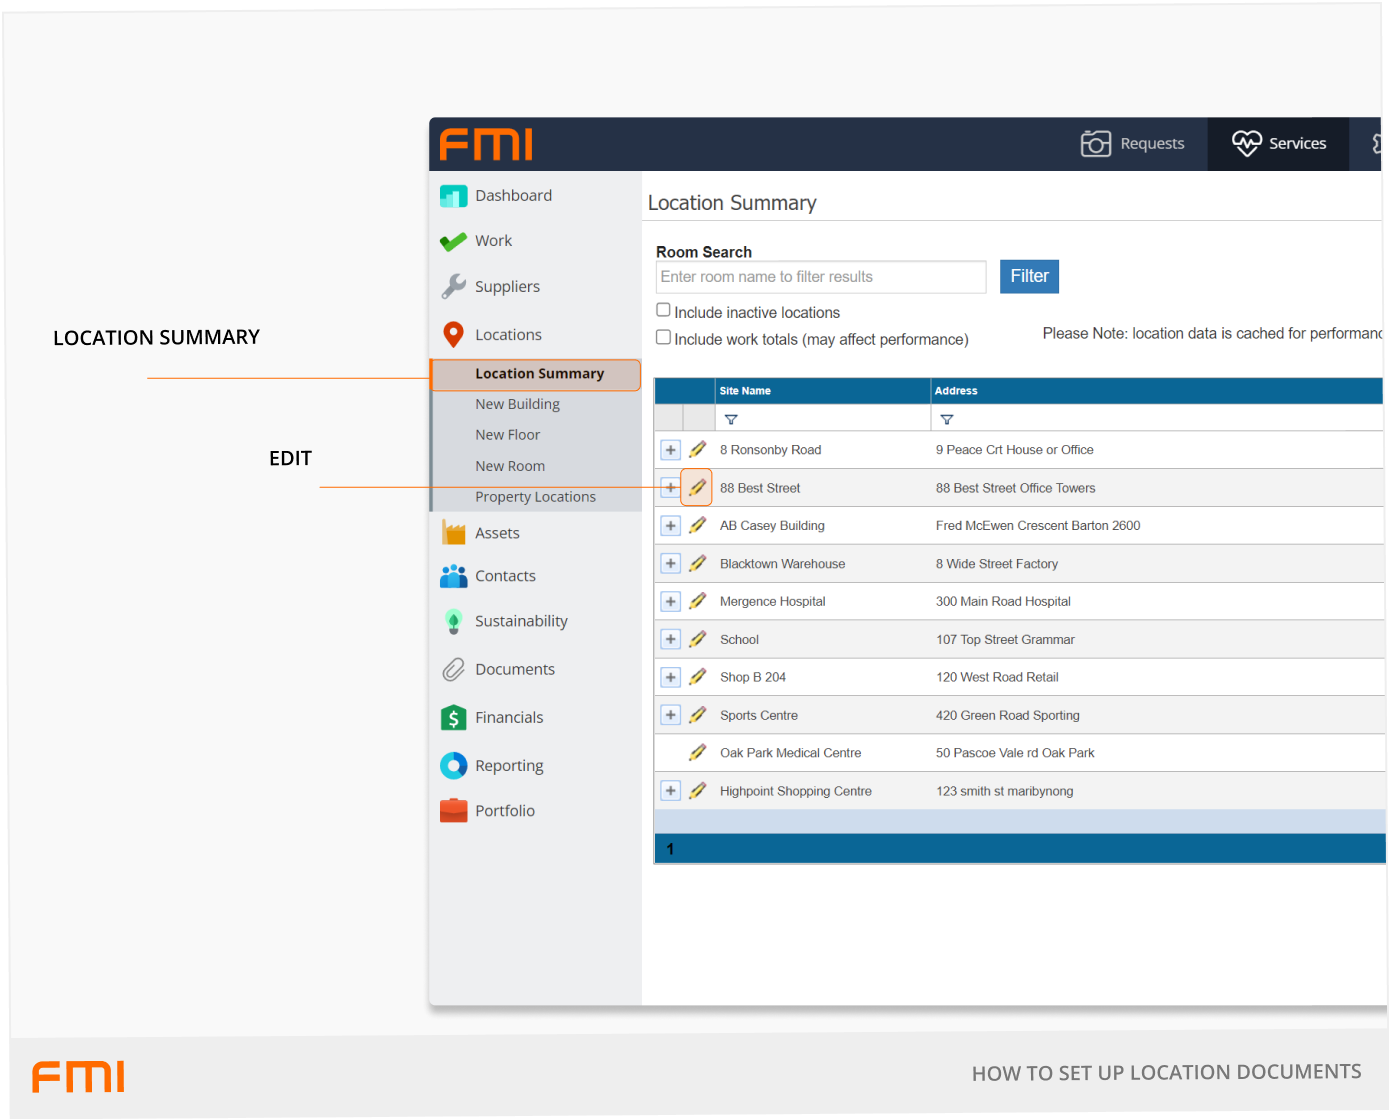
- Locate the required Site, Building, Floor, or Room that you want to add the Location Document/s to.
- Select the pencil icon to edit the location. This will bring up the location’s Details.
Adding Location Documents
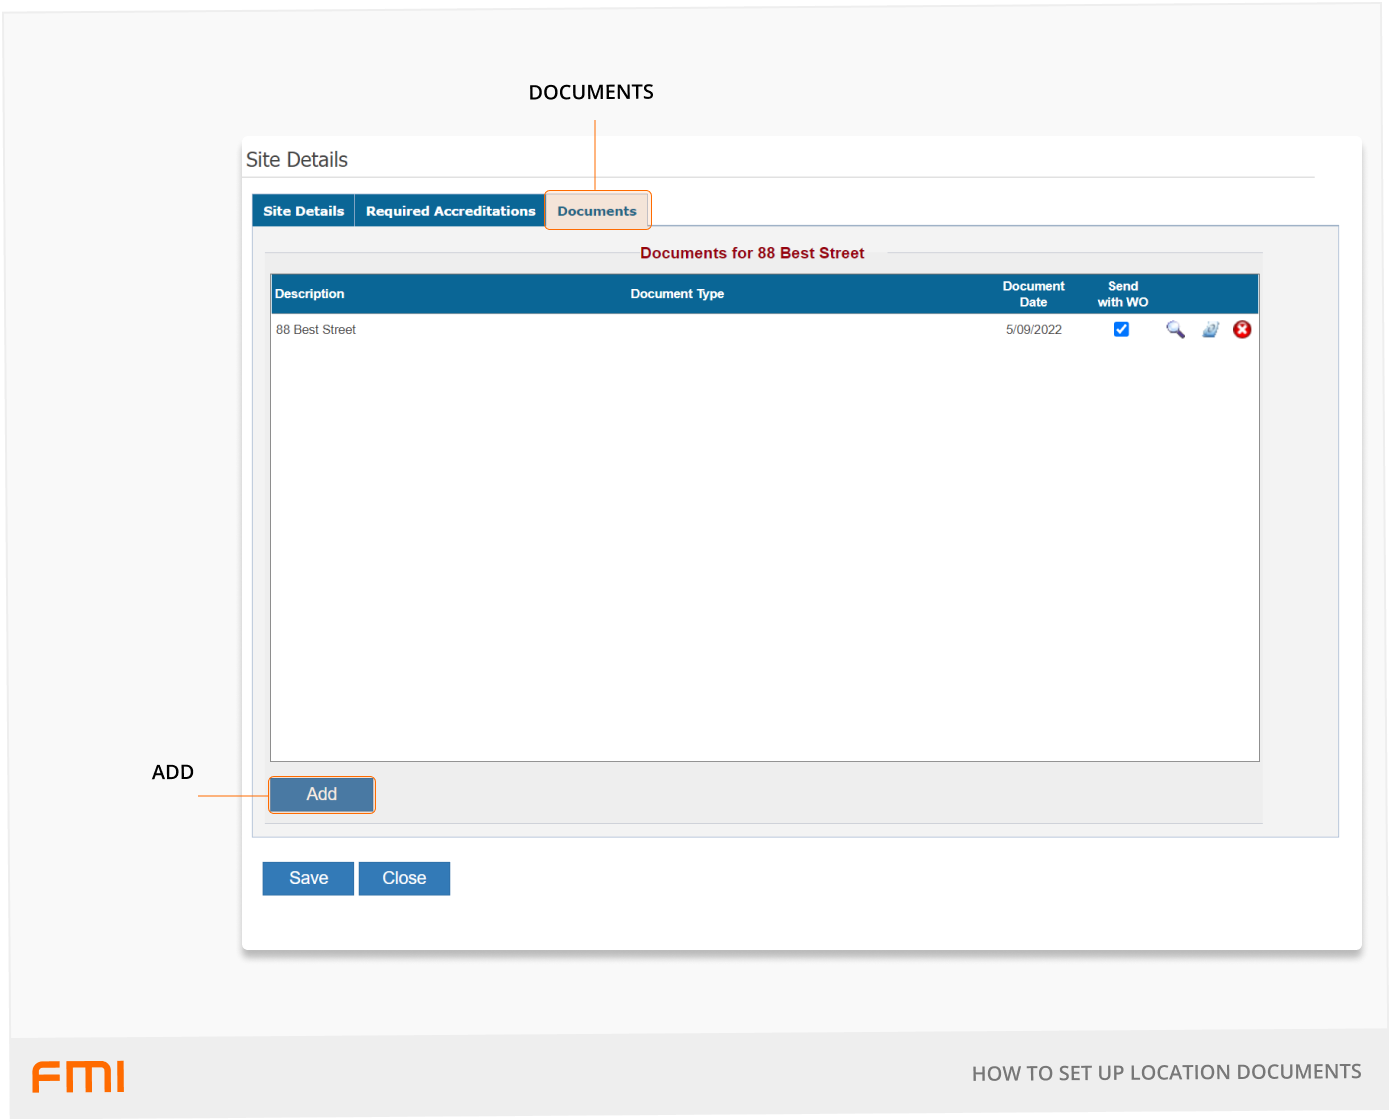
Select Documents and then Add. This will open the Add Standard Document – Work screen.
Follow the steps below to upload your document/s.
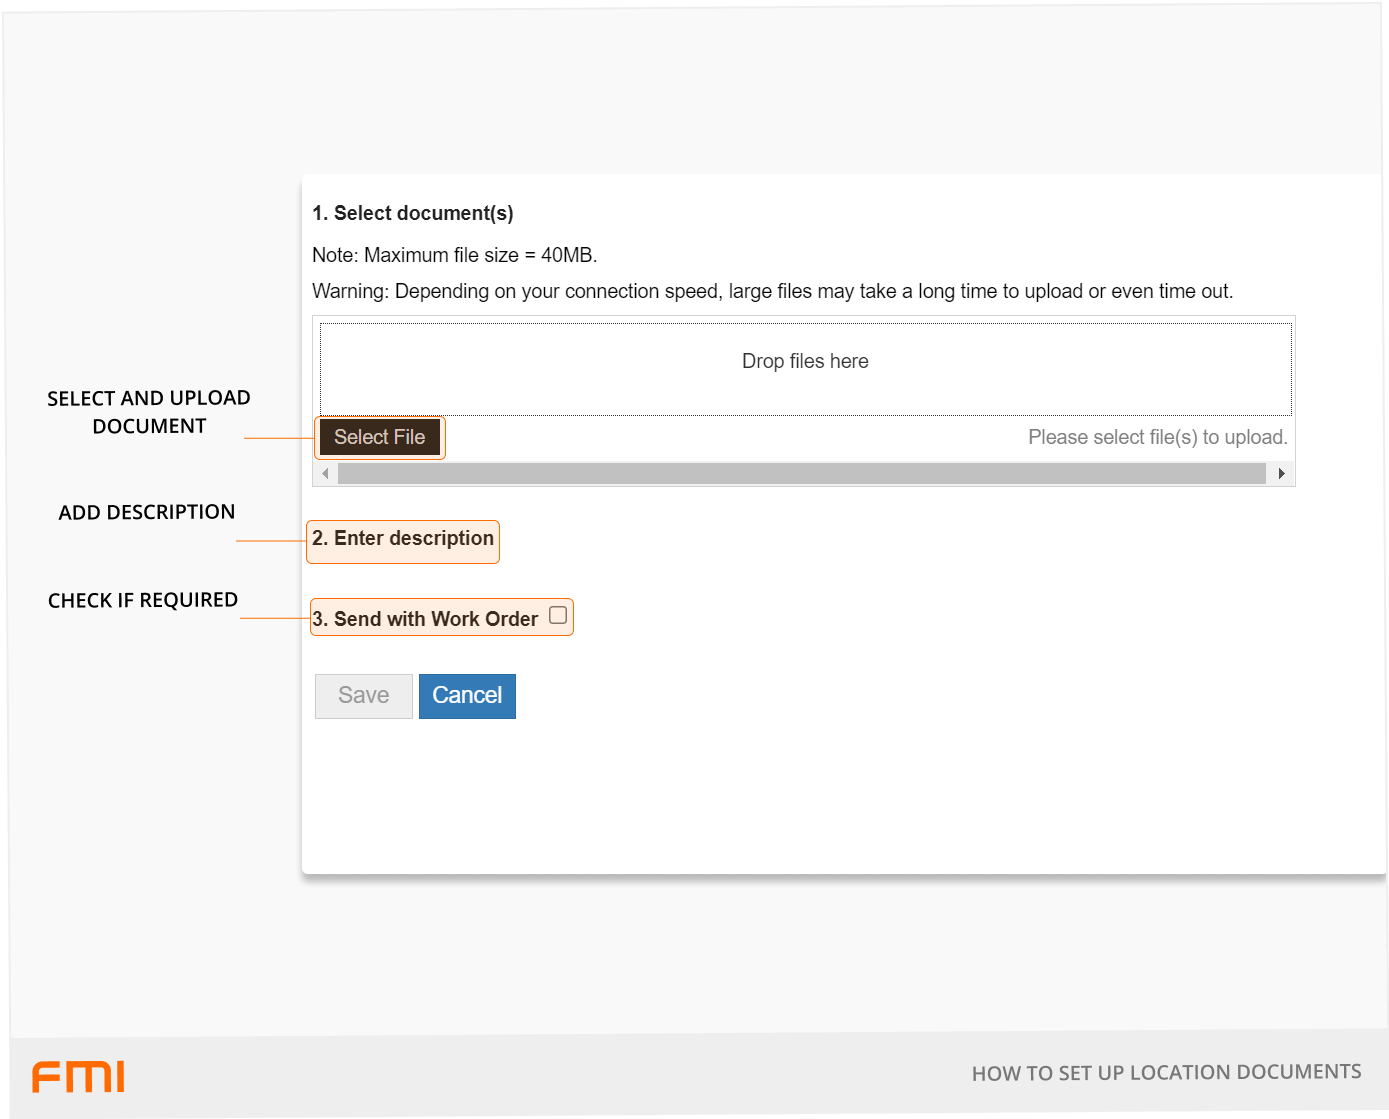
- Select File to upload a document that is already saved to your files. Alternately, drag and drop the saved document into Drop files here. Select Upload.
- Enter the document Description. This is what the recipient will see so we recommend using a meaningful description. For example, “Site Map”.
- Select Send with Work Order. This is required to automatically send the document with the associated locations’ work orders.
- Select Save.
- Repeat the above steps to upload any additional documents.
Tips
- The maximum individual file size is 40MB.
- Location Documents can be deselected on individual work orders if the information does not need to be provided to the recipient.