This article is for FMI Works users who have been given the permission of Works Coordinator
Overview
The Projects feature can provide useful visibility over projects within your facilities. Common scenarios for using Projects include:
- Construction of new buildings.
- Refurbishment projects.
- Fit-outs.
Adding a new Project
The first step is to set up the Project.
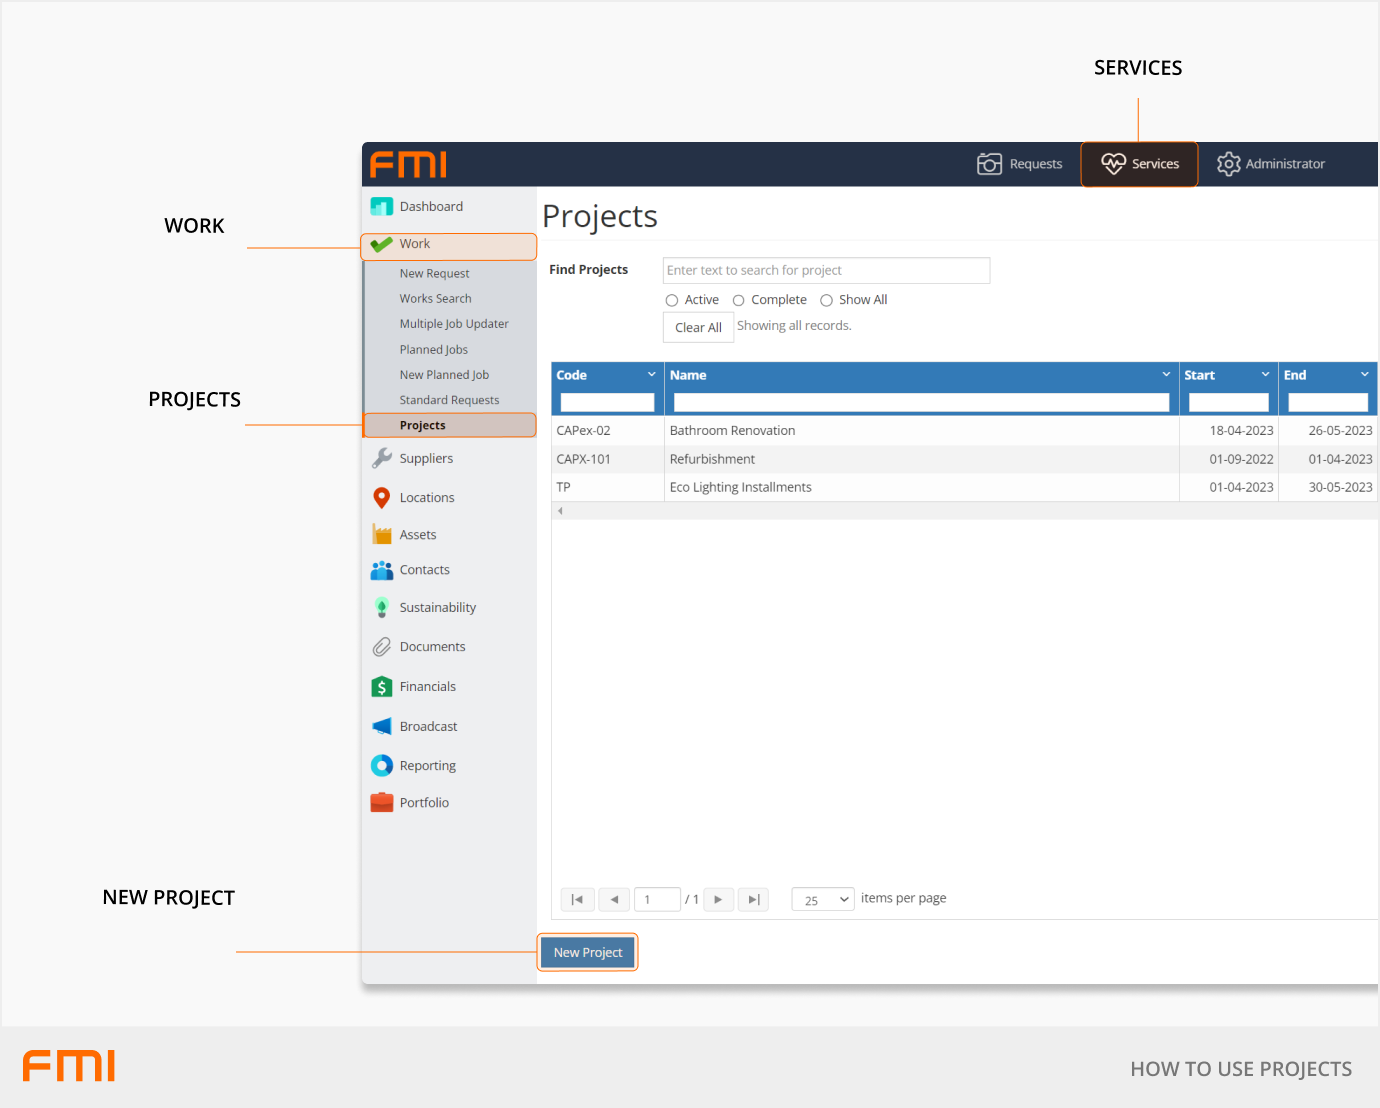
Go to the Services module and select Work > Projects > New Project.
Update the following fields.
Project Code: a unique code that does not exceed 10 characters in length.
Name: short name of project.
Description: long description of project.
Select Department/Cost Code: if applicable, this is an optional field.
Site: location of project (if the work runs over several sites, consider using the Budgets feature instead).
Project Leader: select from the drop down.
Start Date: expected start date of project.
Finish Date: expected end of project (note that once the end date has expired the project becomes inactive and you will no longer be able to assign work orders to the project).
Type: choose between Major or Minor works.
Total Cost: the expected dollar amount of the project.
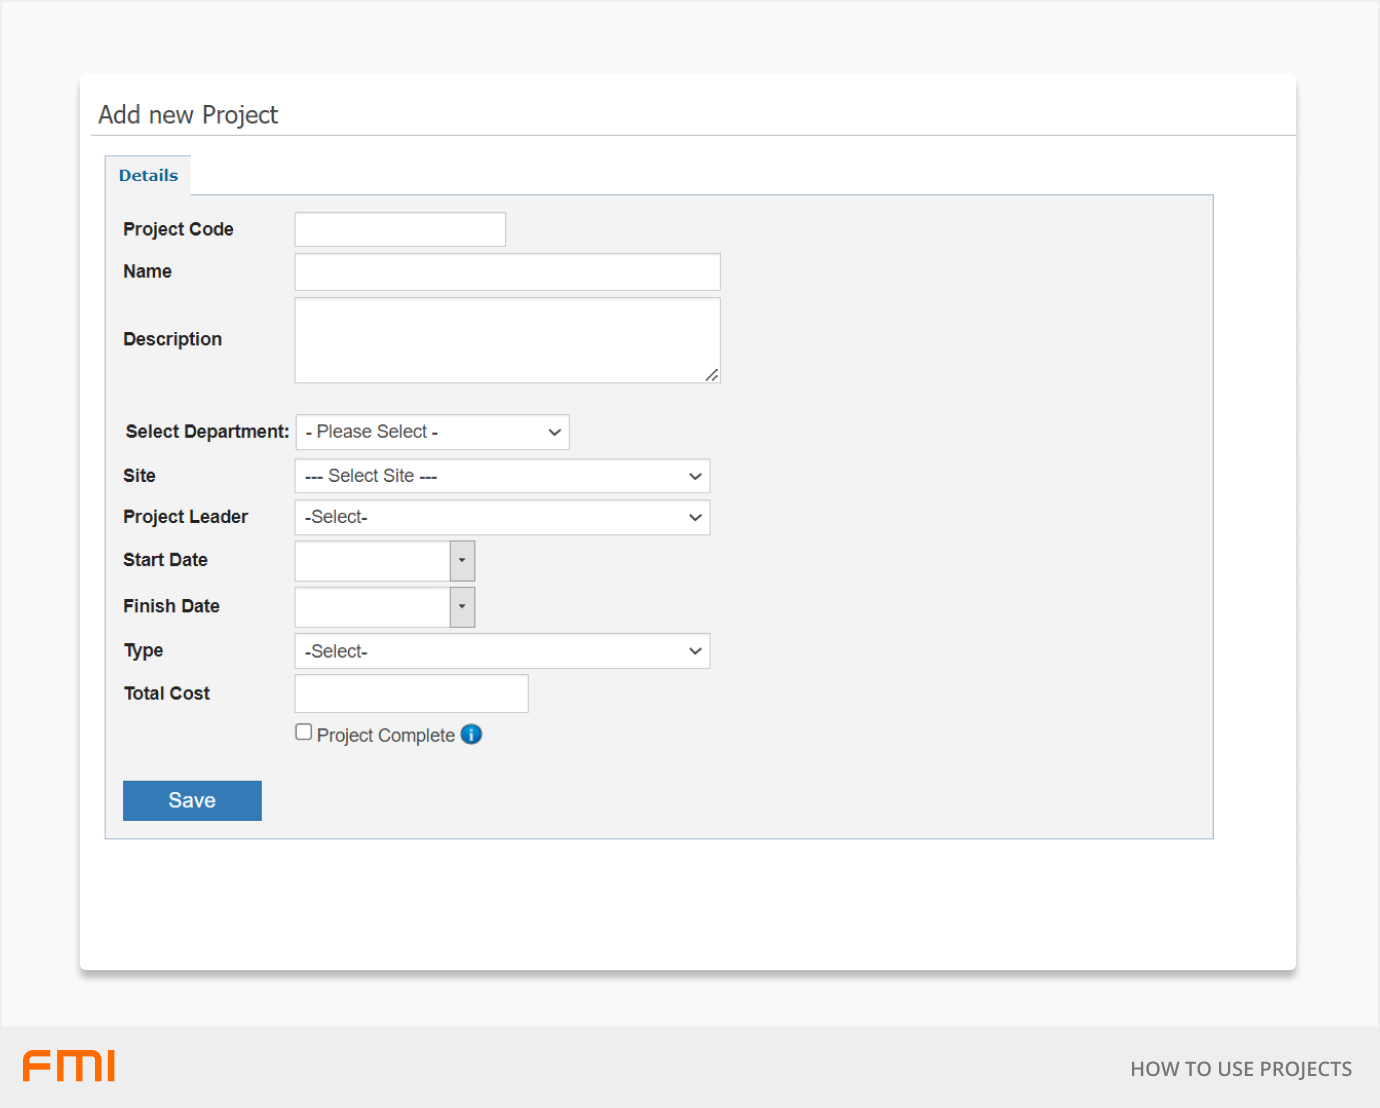
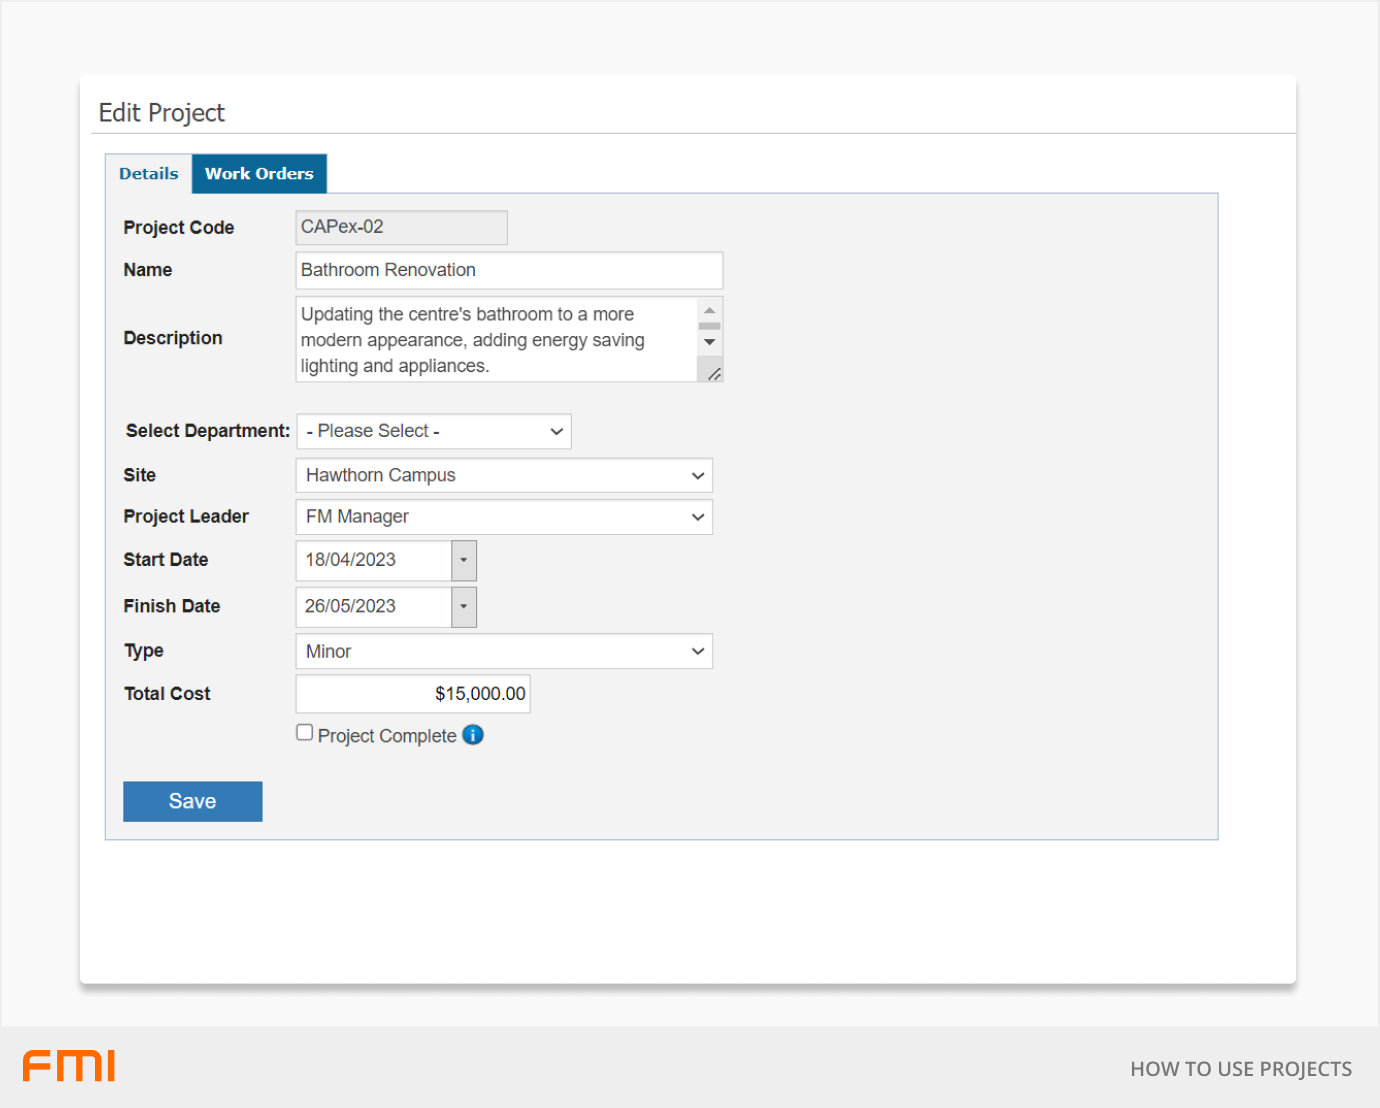
Select Save once the fields have been updated.
A new tab will appear next to the Details tab called Work Orders. This is where work orders linked to your project will be displayed.
Creating the Project Standard Request
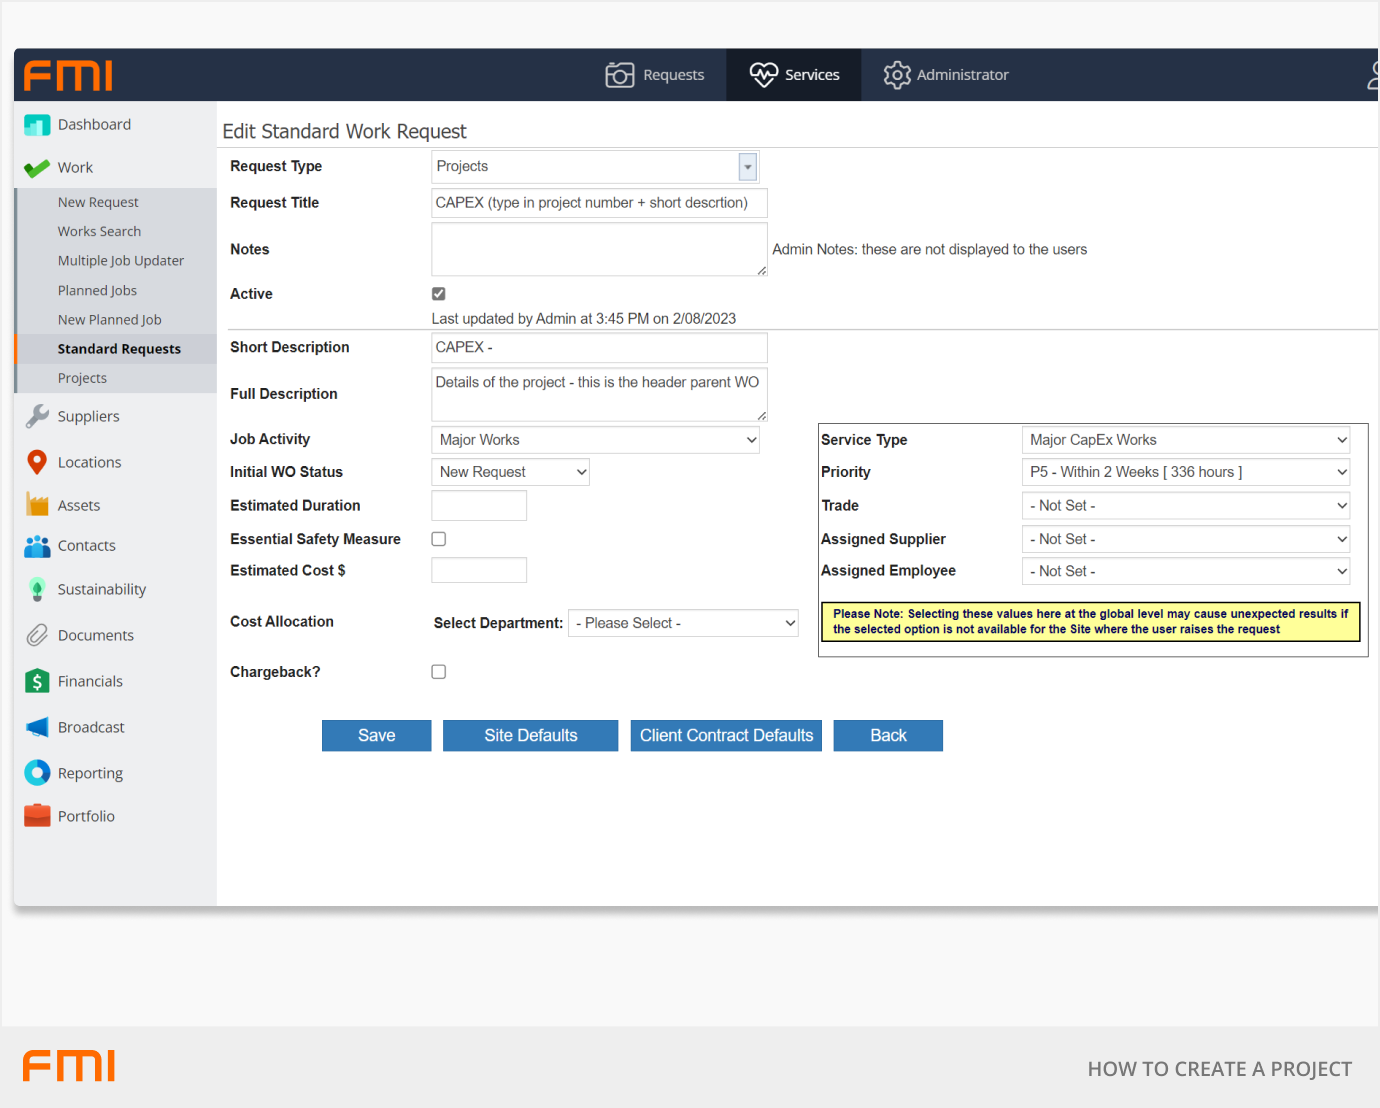
Before commencing your first project it is recommended that a Standard Request be created for project work.
Using a Standard Request makes searching and identifying project work easier. It need only specify the title. For example, 'CAPEX (Specify project number + type of work)'. The additional request information can be updated after the request is raised.
Adding costs to Projects
To start adding costs to Projects, see How to Use Projects.