This article applies to our FMI Works product, when delivered as a cloud solution
Why use OKTA as an SSO provider
FMI Identity can allow login via your organisation's existing OKTA for added security and ease of use, allowing your IT department to manage authentication, as well as reducing the load on your staff by only requiring them to manage their passwords for a single system.
Once configured by our support staff, any users that try to sign in from your owned domains will be redirected to your organizations OKTA login page to complete the process. Our system uses very little information from your OKTA configuration and will only use enough data to authenticate your users.
For more information about FMI and SSO generally see our Single Sign-on article.
How do we connect?
We use OpenID Connect to ensure that your login is as smooth and secure as possible. FMI Identity never has access to your OKTA credentials, and only receives enough information to validate your login.
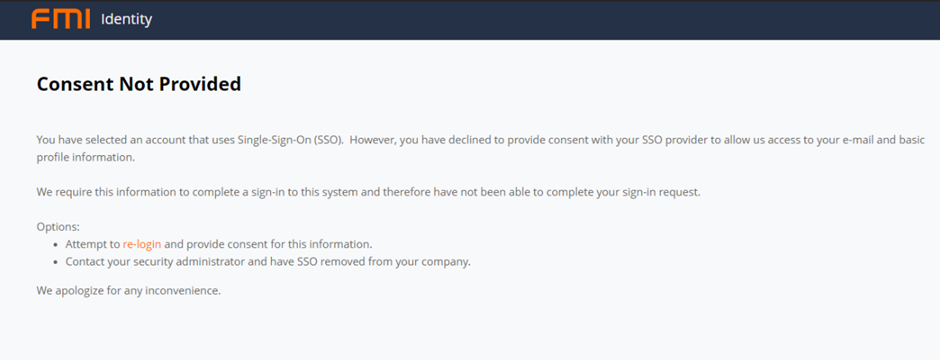
Access rights and consent
FMI does not require any additional OKTA API Scopes, it only requires the users be assigned to the application. If a user is not in any group assigned to the application in OKTA they will be presented with a message that consent has not been provided.
Configuring the OKTA Integration
Initial steps
-
Sign in to your Okta account as a user with administrative privileges.
-
In the Admin Console, go to Applications > Applications.
-
Select Create App Integration.
Create an OIDC integration
- On the Create a new app integration page, select OpenID Connect in the Sign-in method section.
- Choose Web Application for your integration.
- Select Next.
- In General Settings, enter a name for your FMI Works integration and (optionally) upload a logo.
- Add your Sign-in redirect URIs and Sign-out redirect URIs.
https://login.fmiworks.com/signin-okta-<<organization>>
https://login.fmiworks.com/signout-callback-oidc - In Assignments, assign the group to have access to FMI or use the Everyone default to allow all in the organisation access to FMI Works. If specifying groups, be sure to verify that the users you want to have access are assigned to the group\s that you select.
- Select Save.
Provide Application Details to FMI customer support
- Once the application has been created in OKTA, the Client ID and Client Secret need to be provided to FMI customer support for configuration. As well as the base URL for OKTA.
- Once provided, FMI will configure FMI Identity with these details to allow OKTA SSO.
- Once configuration has been setup FMI will then reach out to test the OKTA Single Sign-On process
Test Single Sign-On
- In your browser, begin the sign-in process to FMI by entering your email into your FMI provided URL. This will then redirect the user to the organisations OKTA login page.
- Sign in to your OKTA user account on the Okta-hosted sign-in page.
- Confirm that Okta successfully redirects back to FMI and logs in the user.