This article is for FMI Works users who have been given the permission of System Administrator
Why use sites?
A site is usually a geographical location that represents a logical group of one or more buildings or a property title.
When setting up sites, a minimum of one building is required for a site.
Site locations not only provide important information about where work needs to be completed; they also allow data analysis on the relative performance of sites from a maintenance and asset management perspective.
For an overview of how locations are used in FMI Works, see our article How to Get Started with Location Data.
Setting up sites
Careful consideration must be made when working out the naming conventions for your sites.
Some people may call a site one name whereas others may call the same site something else. Thus, it is important the naming convention is standardised and is understood by everyone within your organisation.
Updating site details
Changes to the site name can be made at any time and will be reflected in historical work orders and other records.
Sites can either be updated:
- Individually, on the Site Details screen, as outlined below; or
- In bulk, using the Location Import Tool.
To update individual records, from the Services module go to Locations > Location Summary. Select the edit icon next to the Site.
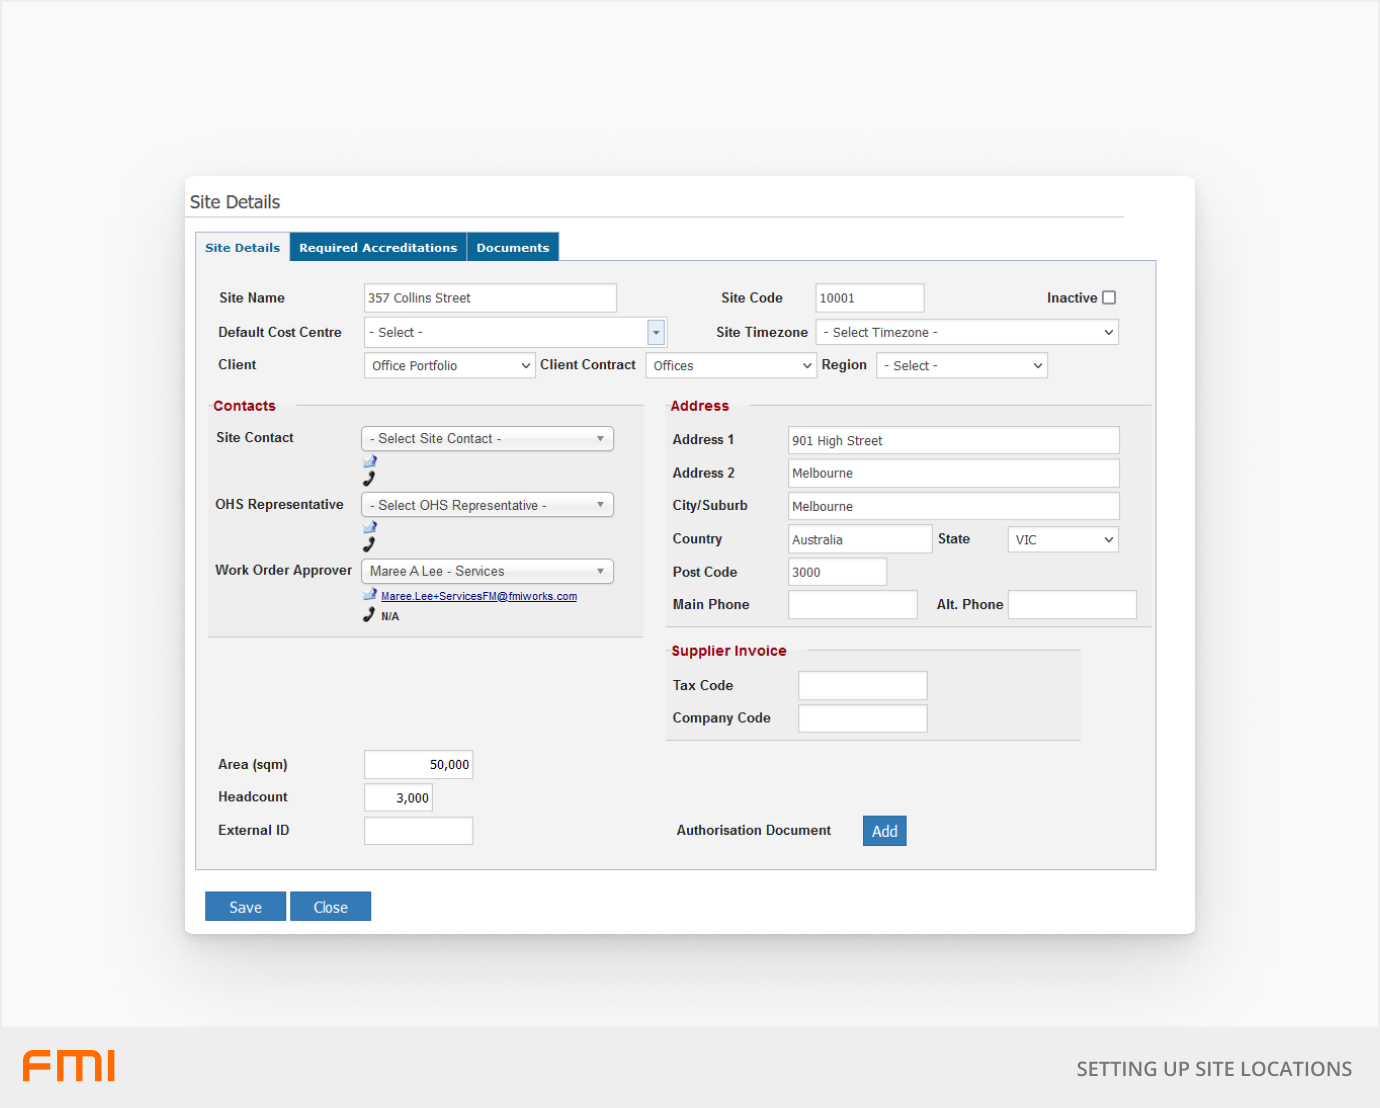
The fields available on the site record are as follows.
| Site Name | Used to identify the location when raising a work order. Also used for searching and filtering information. |
| Site Code | An optional field for searching the site on the work order. |
| Client/Client Contract/Region | If you are using client contracts in Portfolio, you can select the client contract here. |
| Inactive | Check this option to set the site to inactive. This will remove the site from view where it is a selectable option. An inactive site will still be linked to any historical work orders. |
| Default Cost Centre | Select the default cost centre for this site. If filled, work orders raised for this site will have the Cost Centre field pre-filled with the Default Cost Centre. |
| Site Timezone | UTC+10 is the default time zone. If the site is located outside Melbourne, Sydney or Canberra, select the time zone where the site is located. This option will adjust request times on work orders so that scheduled start and completion times are accurate to the local time of the site. |
| Area (sqm) | Enter the SQM measurements for the floor. This information is useful for reporting and can be viewed from the Location Summary page. |
| Headcount | Enter the headcount values for the floor. This information is useful for reporting and can be viewed from the Location Summary page. |
Contacts
| Site Contact | Select the site contact for this site. The site contact’s name, email and contact number are visible on the work order PDF if the contractor needs to contact them. In addition, Work Order Status Change Notification Emails can be sent to the site contact to update them on the progress of the work order. |
| OHS Representative | Select the OHS representative for the site. |
| Work Order Approver | Select the default work order approver for this site. |
| Address | The address is visible on the work order PDF, and it will assist the contractor in finding the location of the work. |
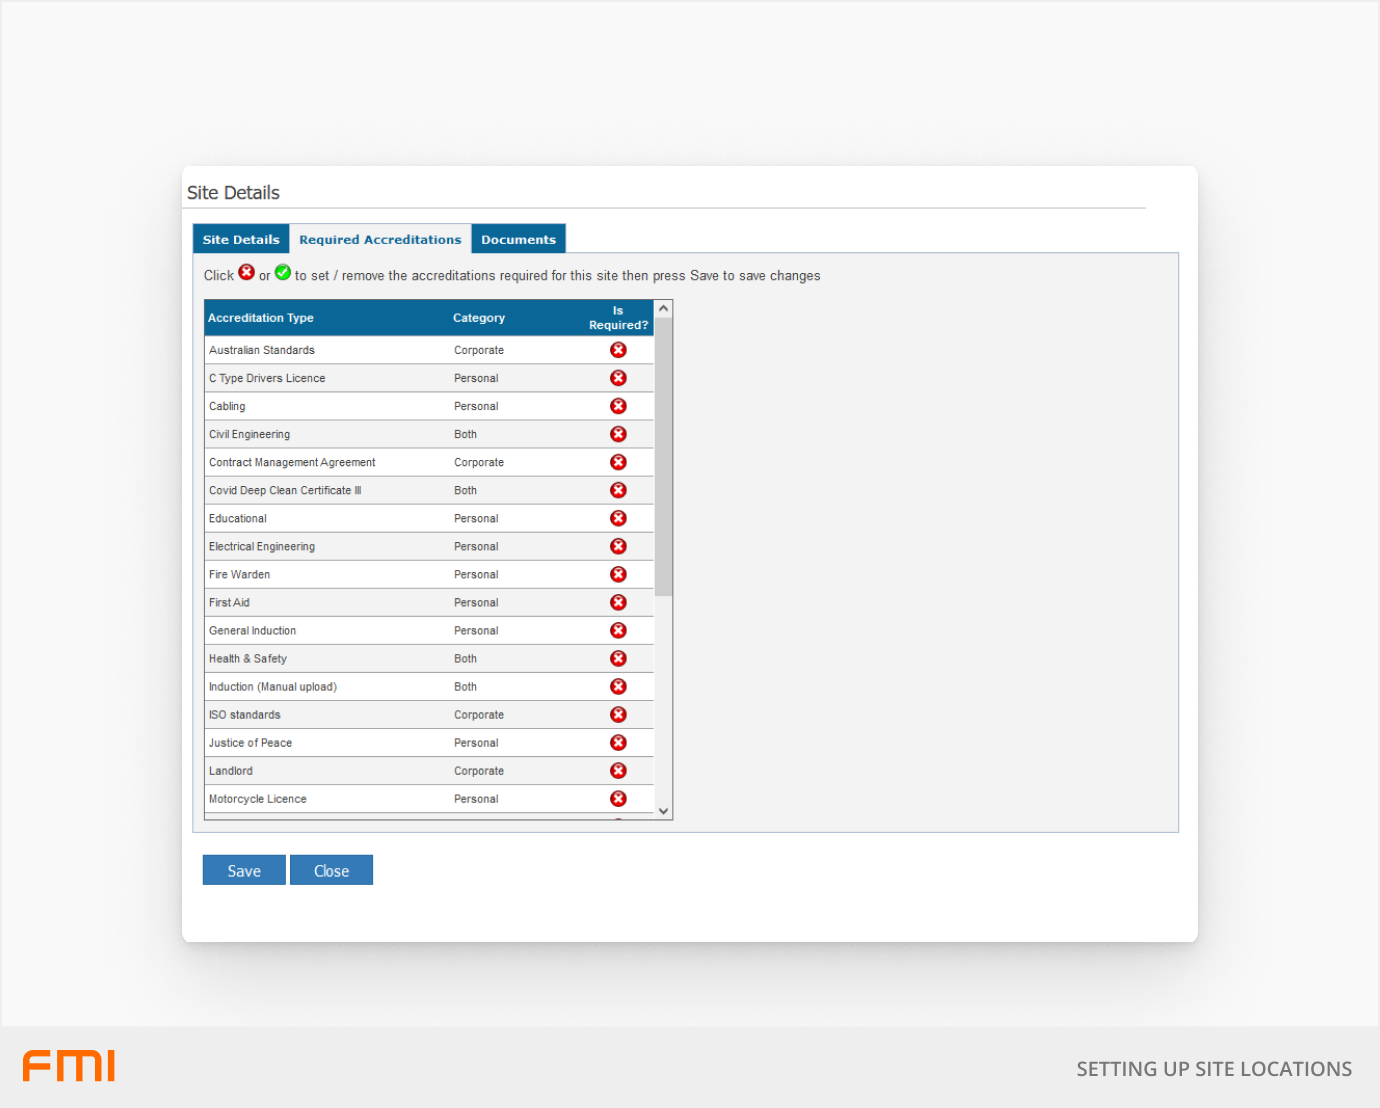
Required Accreditations
If an accreditation is required before the supplier or contractor is allowed to perform work on the site, it can be set up on the Required Accreditations tab. Required accreditations are site level thus they are not definable on the building, floor or room.
Enable the accreditation by selecting the X / Tick icon.
When to attach documents to a site
Documents can be attached to the site to capture information regarding the site.
In addition, site documents can be automatically sent with the work order email. This is useful for letting the contractor know about important information like maps or additional instructions when there is work at the site.
To enable this feature, select the Send with WO checkbox for each document that you want attached with the work order. After it is enabled, the document is attached with the work order when a work order is raised for the site.