This article is for FMI Works users who have been given the permission of Reference Administrator
Introduction
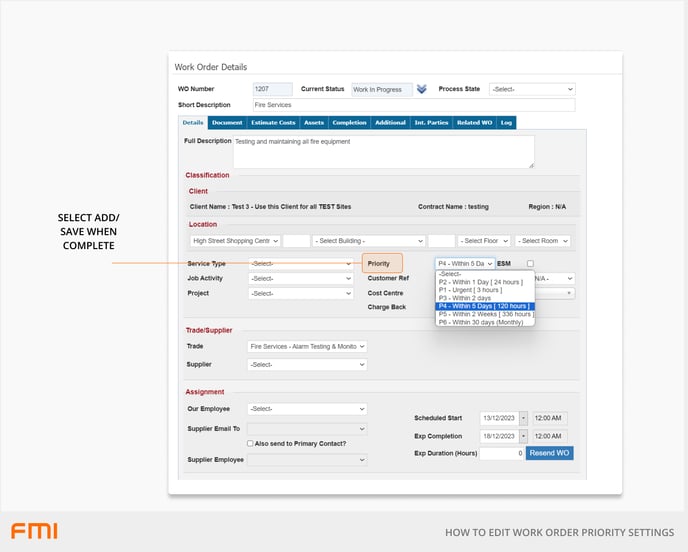
In FMI Works, each work order is given a priority. Priorities convey the urgency of the work and set expectations about when the work needs to be started and completed.
In this article we explain how to update the default priority settings.
How the priority works
The default priority on the work order is derived from the Standard Request settings. The default priority can be changed on the work order by the triage team if required.
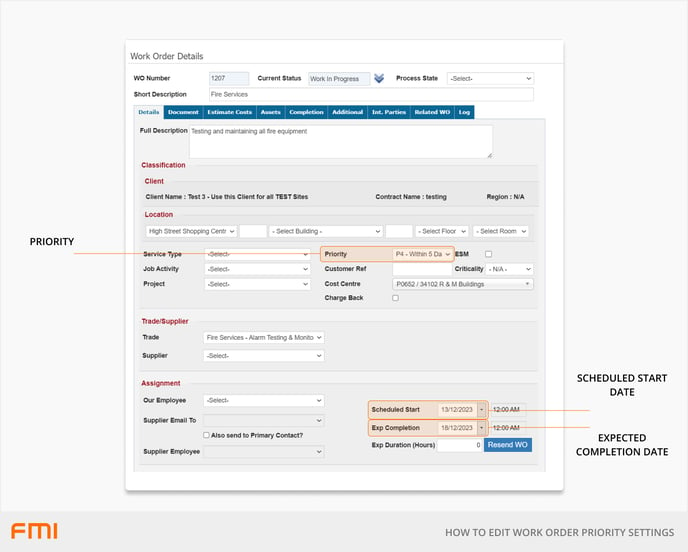
The priority drives the Scheduled Start and Expected Completion date. This is visible to tradespeople and other parties that have access to the work order information. If a work order exceeds the expected completion date, it will be automatically flagged as 'Overdue' and appear on the Services dashboard and in the overdue reports.
Where to start
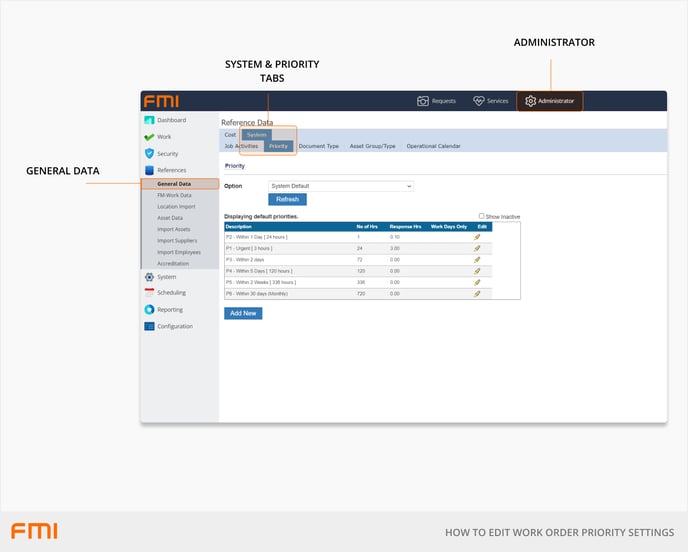
Go to the Administrator module and select References > General Data.
Select the System tab and the Priority tab.
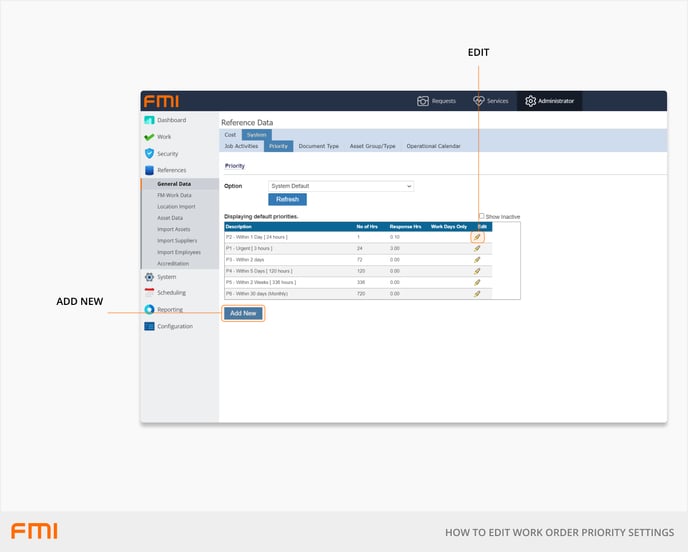
To edit an existing priority, select the Edit pencil icon.
To add a new priority, select Add New.
Note: Priorities cannot be deleted therefore they will need to be set to 'Inactive'.
Making a priority inactive
Over time, new KPIs may be set by your organisation and those past priorities may no longer be applicable. These priorities can be set to 'Inactive' however the history of inactive priorities is retained for historical KPI reporting.
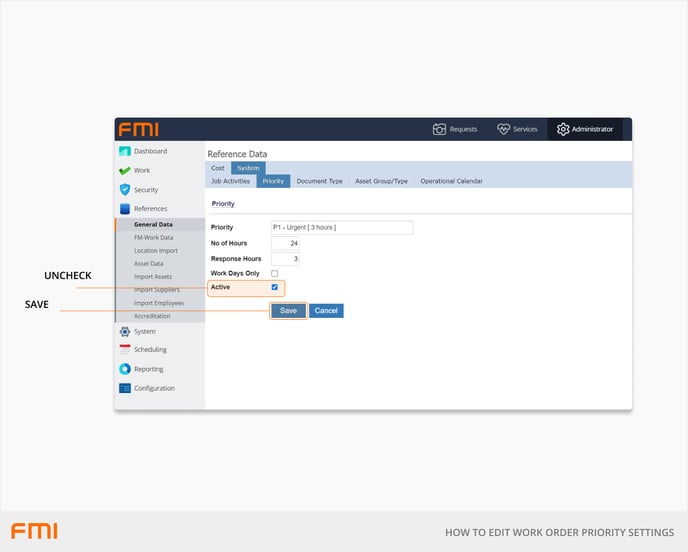
To make a priority 'Inactive':
- Select Edit.
- Uncheck the Active box.
- Select Save.
A priority can be set back to active at any time by checking the Active box.
Adding or editing an existing priority
Before editing an existing priority, consider how this will impact historical KPI reporting. In some cases, it may be better to make a priority inactive and add a new priority.
Priority
This is the description that will be displayed for users to select from.
Tip: Include the number of hours in the title. For example, P1 – Urgent (3 hours) so that all parties are clear on what the priority means.
No (Number) of Hours
Enter the number of hours you wish this job to be completed in. For example, if you want it in five hours, enter 5. If the request is not urgent and you would like the timeframe to be a week, enter the number of hours (this dependent on what you have set as work hours), and convey this in the priority title. This field drives the Expected Completion date for a work order.
Response Hours
Enter the number of hours work must begin within. This field drives the Scheduled Start date for a work order. For example, if the Response Hours is 24, the Scheduled Start date will be the following day (the date created plus 24 hours).
If the response time is left blank in the priority settings, the Scheduled Start date will be blank when a work order is generated and must be updated manually. Note, that once you manually enter the Scheduled Start date, this cannot be amended.
Workdays Only
Checking this box will exclude non-workdays in the priority calculation. Workdays are set up in the Work Week Plan settings, which can be found in Administrator > Work > Work Week Plan. For example, if you have set Monday to Friday as your workdays, the priority calculation will ignore Saturday and Sunday and resume on the next workday.
Active
This box indicates if the priority is in use or not. If it is checked, this priority will be selectable against Standard Requests and on work orders. If unchecked, it won’t appear in the drop-down list for priorities.
Save or Add
If editing an existing priority select Save.
If adding a new priority select Add.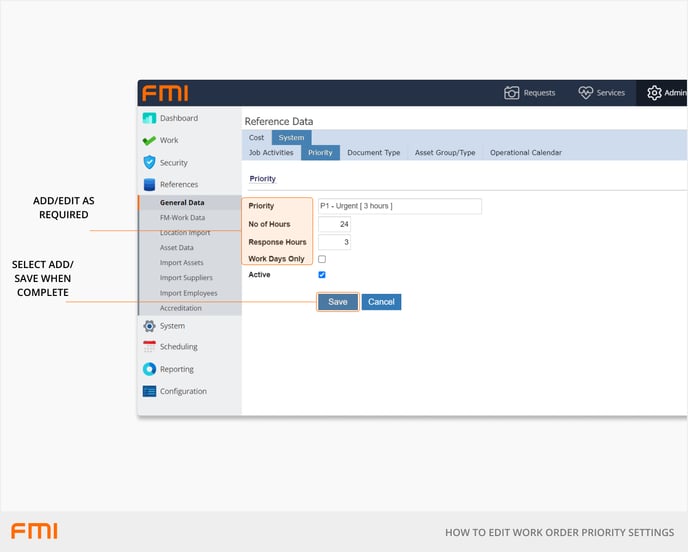
Selecting priorities
Priorities that are set to 'Active' are selectable on work orders or Planned Jobs.