This article is for FMI Works users with the permission of Coordinator, Manager or Administrator
Planned Job Wizard Overview
The Planned Job Wizard includes five steps in the creation of a Planned Job.
- Step 1, setting up core work order information.
- Step 2, setting the frequency cycle.
- Step 3, adding assets.
- Step 4, adding further details.
- Step 5, adding documents and reviewing.
Step 1: Setting up core work order information
From the Services module, select Work > New Planned Job. The Planned Job Wizard – Step 1 of 5 dialog will then be displayed.
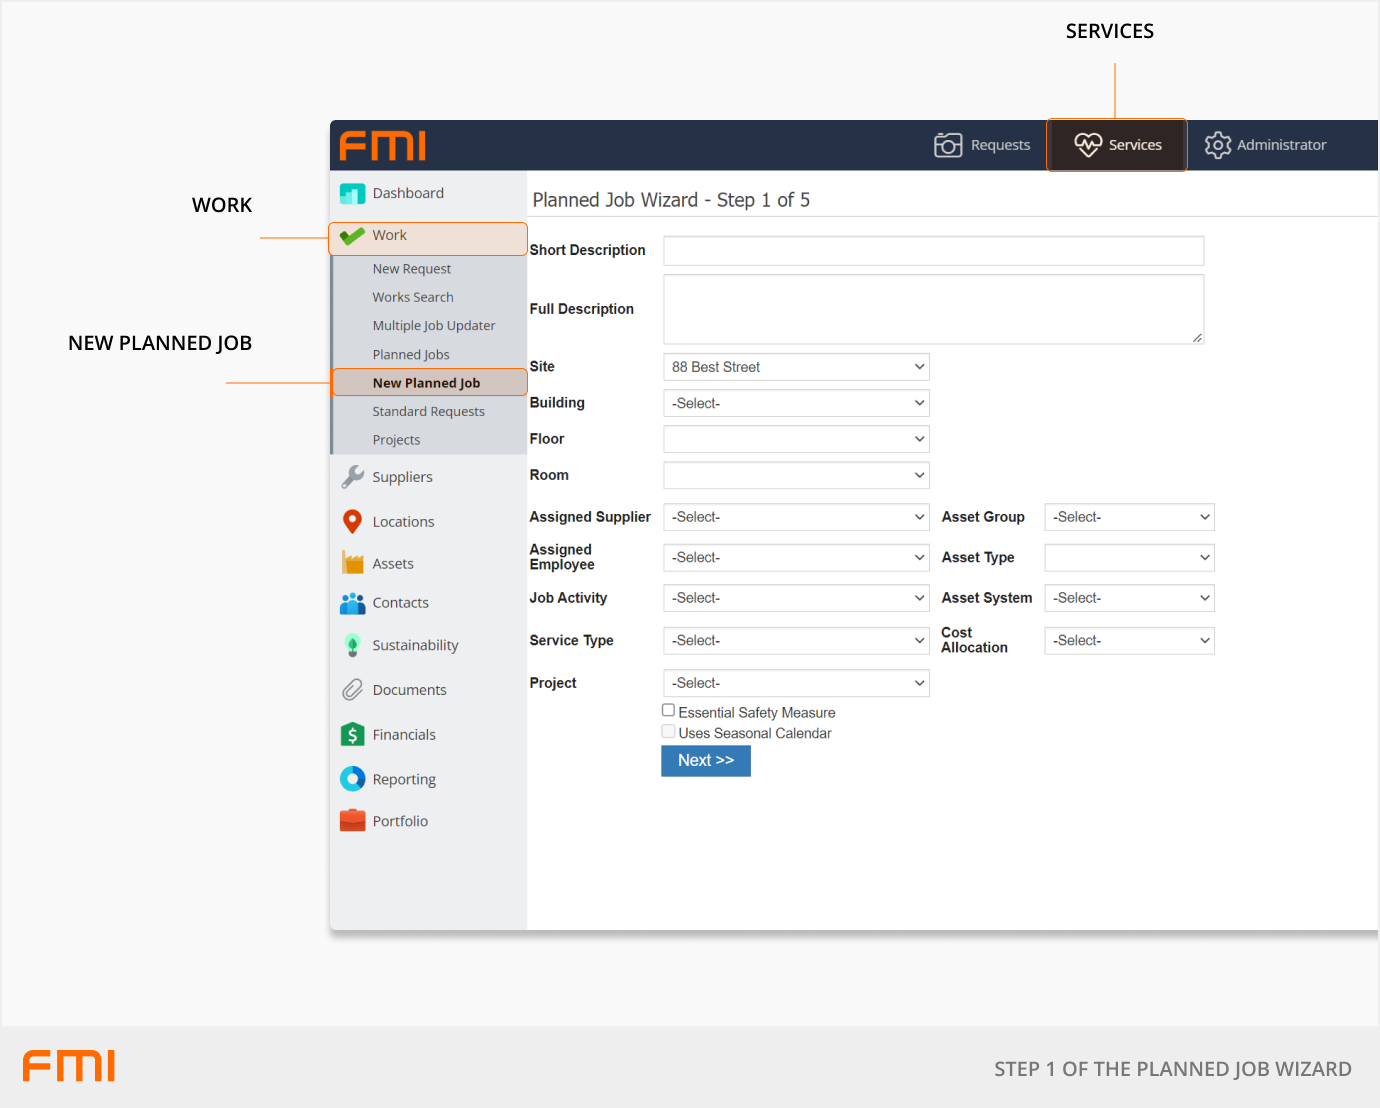
Enter the mandatory and optional fields, as required, displayed below.
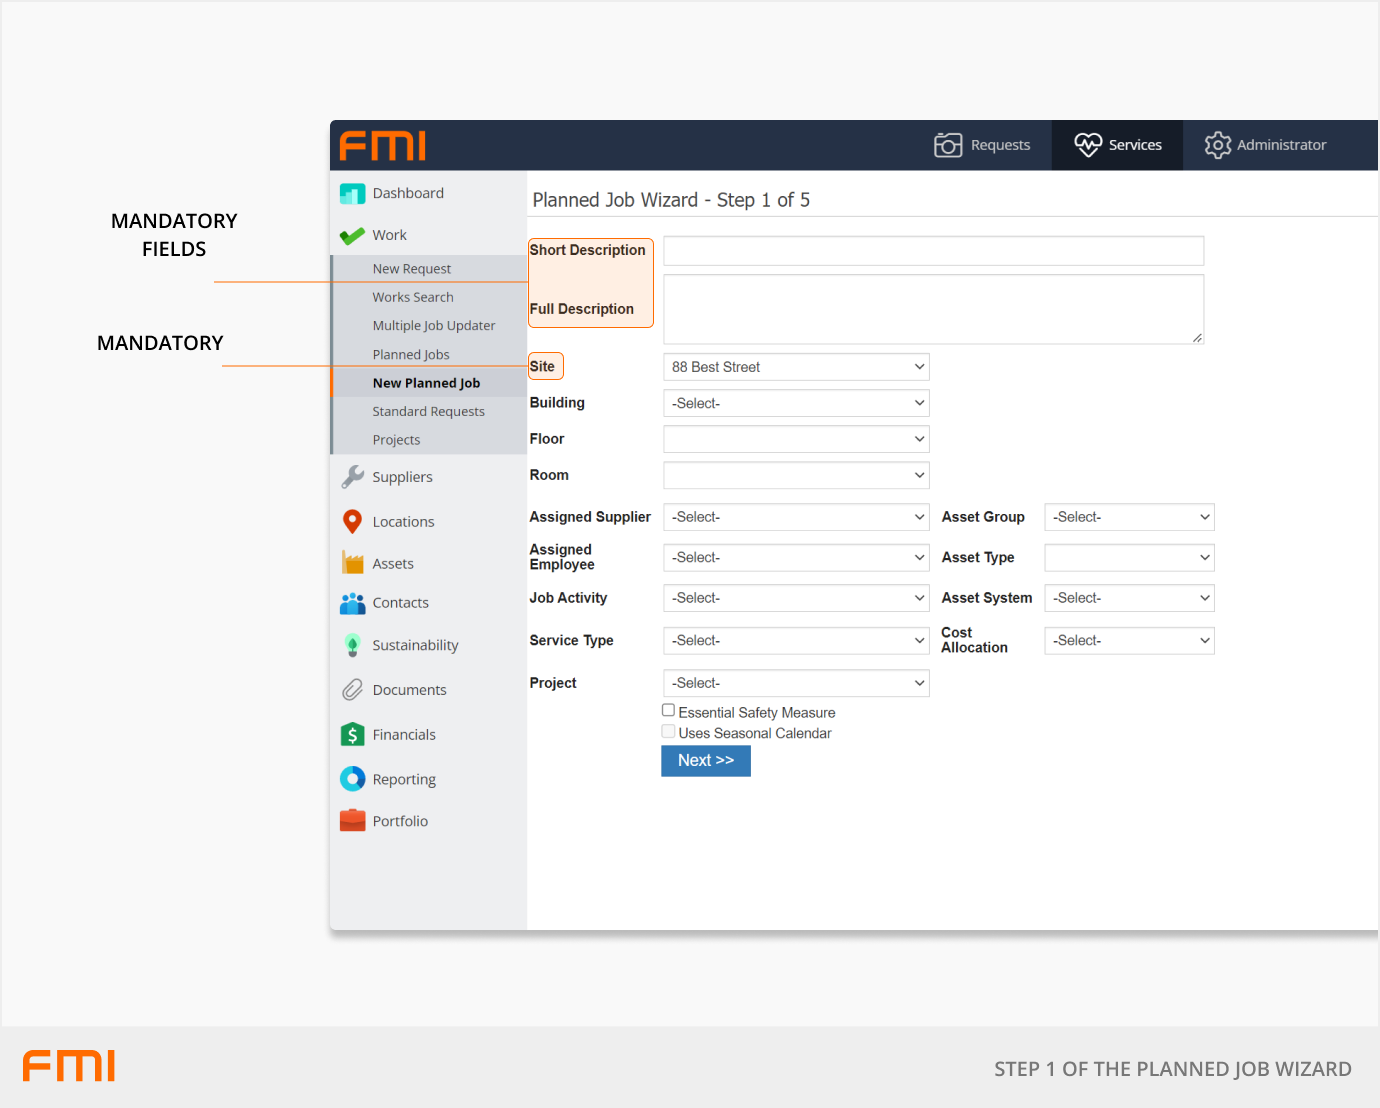
Mandatory fields
- Short Description: Describes the Planned Job. Used in cascading Planned Jobs. For example, 'Lift Maintenance'.
- Full Description: Provide a more detailed description of the Planned Job. If the Planned Job is going to be cascading, then plan how the text will be allocated to each time frame and start each section of the text referencing the time frequency that the section related to. For example, '3-monthly inspection. Check emergency phone, locking mechanism, internal light'.
- Site: Set the applicable Site for the work.
Optional fields - recommended
- Job Activity: Helps filter the work to be done and is useful for running reports.
- Service Type: Helps filter the work to be done and is useful for running reports.
Optional fields
- Building: Further refine the location of the work or applicable assets. Allows filtering of all assets linked to the Building.
- Floor: Further refine the location of the work or applicable assets. Allows filtering of all assets linked to the Building Floor combination.
- Room: Further refine the location of the work or applicable assets. Allows filtering of all assets linked to the Building Floor Room combination.
- Assigned Supplier: Assign the Supplier scheduled to perform the work.
- Assigned Employee: Assign an Employee scheduled to perform the work or to be responsible for monitoring the work being performed.
- Project: Add a Project if applicable.
- Asset System: Select if Assets are to be associated with the Planned Job.
- Asset Group: Select if Assets are to be associated with the Planned Job.
- Asset Type: Select if Assets are to be associated with the Planned Job.
- Cost Allocation: Add cost allocation code if required for operational needs.
- Essential Safety Measure: Select if related to an Essential Safety Measure.
- Use Seasonal Calendar: Not used within system, leave unselected.
More information
For an overview of Planned Jobs, see Getting Started with Planned Maintenance.
Or move on to How to use the Planned Jobs Wizard: Step 2.