This article is for FMI Works users with the permission of Coordinator, Manager or Administrator
Overview of the Planned Job Wizard
The Planned Job Wizard includes five steps in the creation of a Planned Job.
- Step 1, setting up core work order information.
- Step 2, setting the frequency cycle.
- Step 3, adding assets.
- Step 4, adding further details.
- Step 5, adding documents and reviewing.
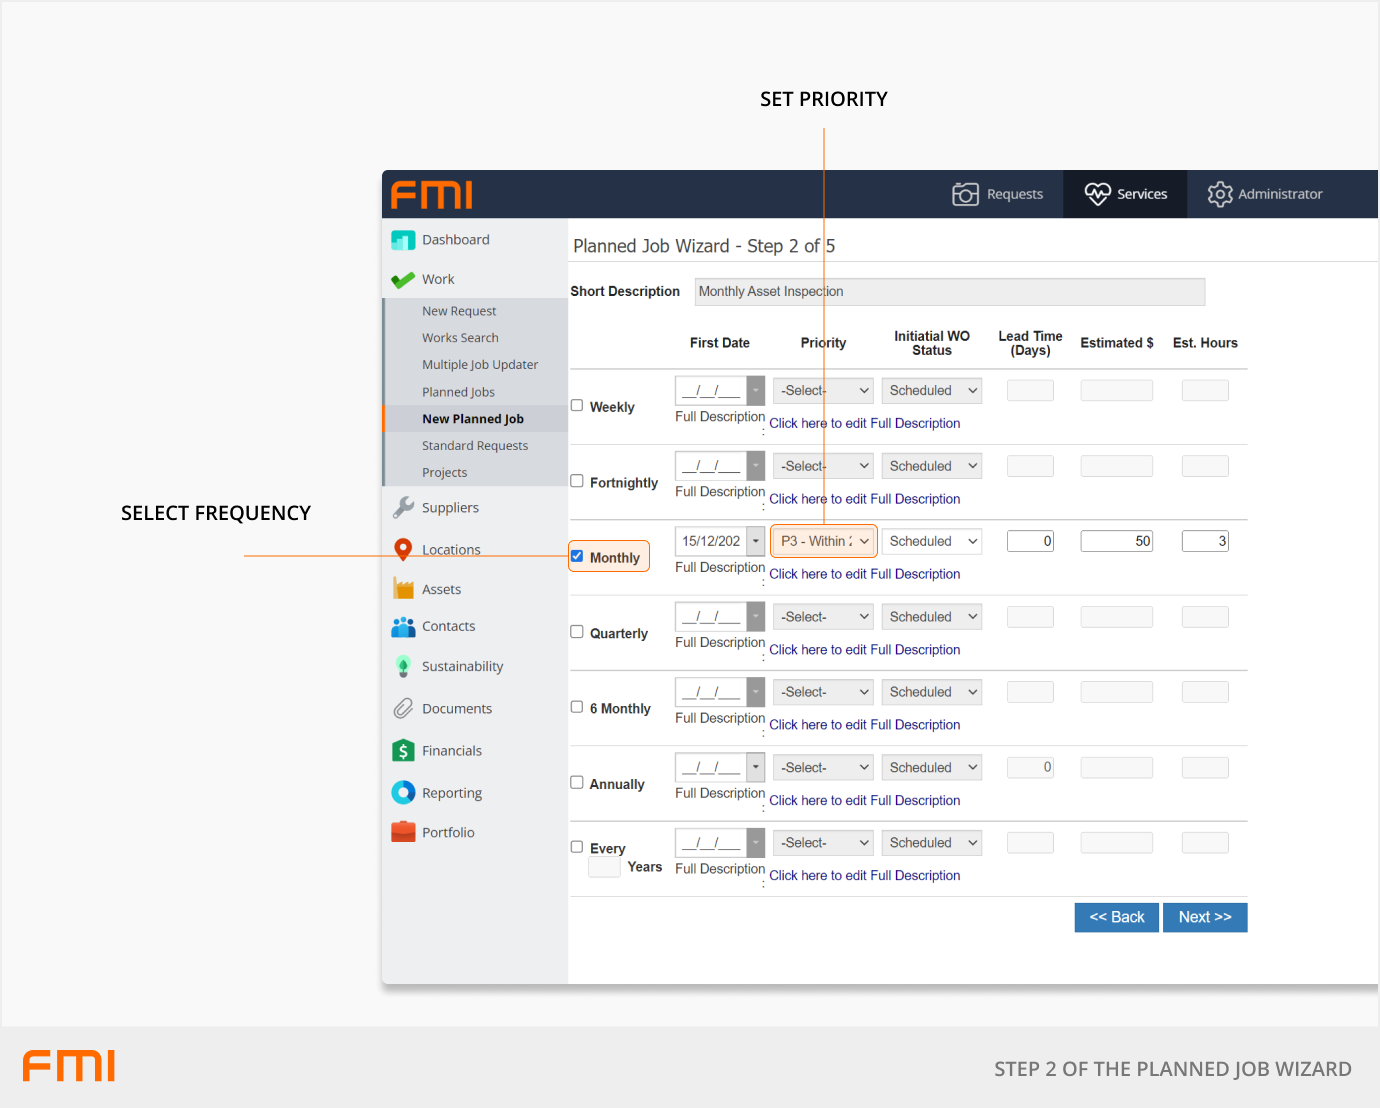
Step 2: Setting the frequency cycle
After completing Step 1, move on to Step 2.
Step 2 allows you to create a standard Planned Job for the required cycle period or create a Planned Job incorporating multiple periods (referred to as cascading Planned Jobs).
Decide on the schedule i.e., monthly, weekly etc. If using multiple yearly intervals, the schedule can be set using the option of Every X Years.
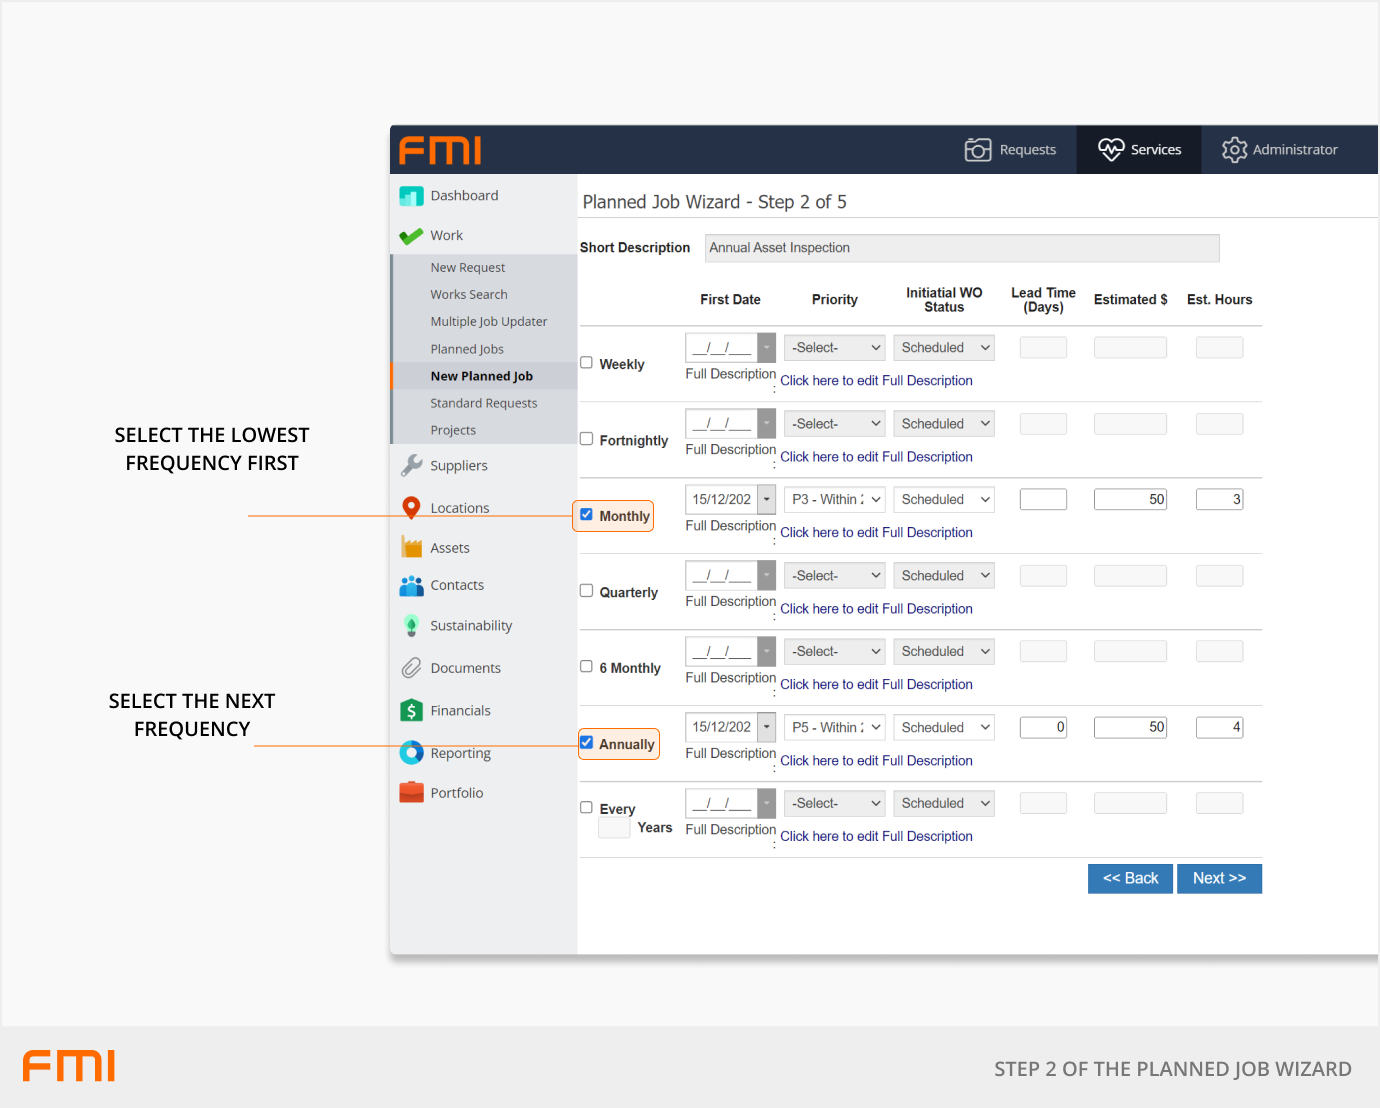
Cascading Planned Jobs
Planned Jobs can be cascading, to avoid duplicate work orders being generated. For example, if a Planned Job recurs every three-months, as well as annually, the three-monthly Planned Job is suppressed when the annual work order is generated, so that the contractor receives only one work order.
When creating a Cascading Planned Job, select the required frequencies using the tick boxes. When setting the dates, there are two options:
- Enter the required date for the lowest frequency time frame, mostly applicable to new assets being added to the maintenance plan; or
- Enter the known “next date” for the highest frequency period (e.g., annual) and the dates for all lower frequencies will be automatically adjusted.
Additional Fields
- Full Description: Select Click here to edit Full Description and for each time period, edit the first line of text so that it is clear what period / time schedule the job relates to (e.g., weekly, quarterly, six-monthly, or annually) and then edit the body of text so that the Job Activity relates to this time period only. Repeat this step for all time periods within the Cascading Job.
- Initial WO Status: Scheduled versus Work in Progress determines the status of the work order created by the Planned Job.
Tip: It is recommended that the Initial WO Status be set to Scheduled.
If Work in Progress is selected, an Assigned Supplier or Assigned Employee must be added to the Planned Job.
There are many reasons this may change over the course of the Planned Job. For example, the employee may leave or the supplier changes, or resource allocation constraints mean work assigned changes from time to time.
By selecting Scheduled, the assignee can be added once the work order is generated.
- Priority: Set the required priority for the work order from the available list, based on the importance of the work and the time frame in which the work should be completed.
- Lead time: The work order can be created prior to the required start date, primarily intended to provide time for the Assigned Supplier to arrange resources for completing the work. This option should only be used when needed as this option may result in the Planned Job being created outside of the month intended and thus skew work order statistics.
- Estimated $: Estimate the cost of undertaking this task.
- Est. Hours: Estimate the number of hours this task will take to complete.
More information
For an overview of Planned Jobs, see Getting Started with Planned Maintenance.
Or move on to How to use the Planned Jobs Wizard: Step 3.