This article is for FMI Works users with the permission of Coordinator, Manager or Administrator
Overview of the Planned Job Wizard
The Planned Job Wizard includes five steps in the creation of a Planned Job.
- Step 1, setting up core work order information.
- Step 2, setting the frequency cycle.
- Step 3, adding assets.
- Step 4, adding further details.
- Step 5, adding documents and reviewing.
Step 5: Adding documents and reviewing
After completing Step 4, move on to Step 5.
Step 5 allows you to add standard documents to the Planned Job, which will be sent out with the work order.
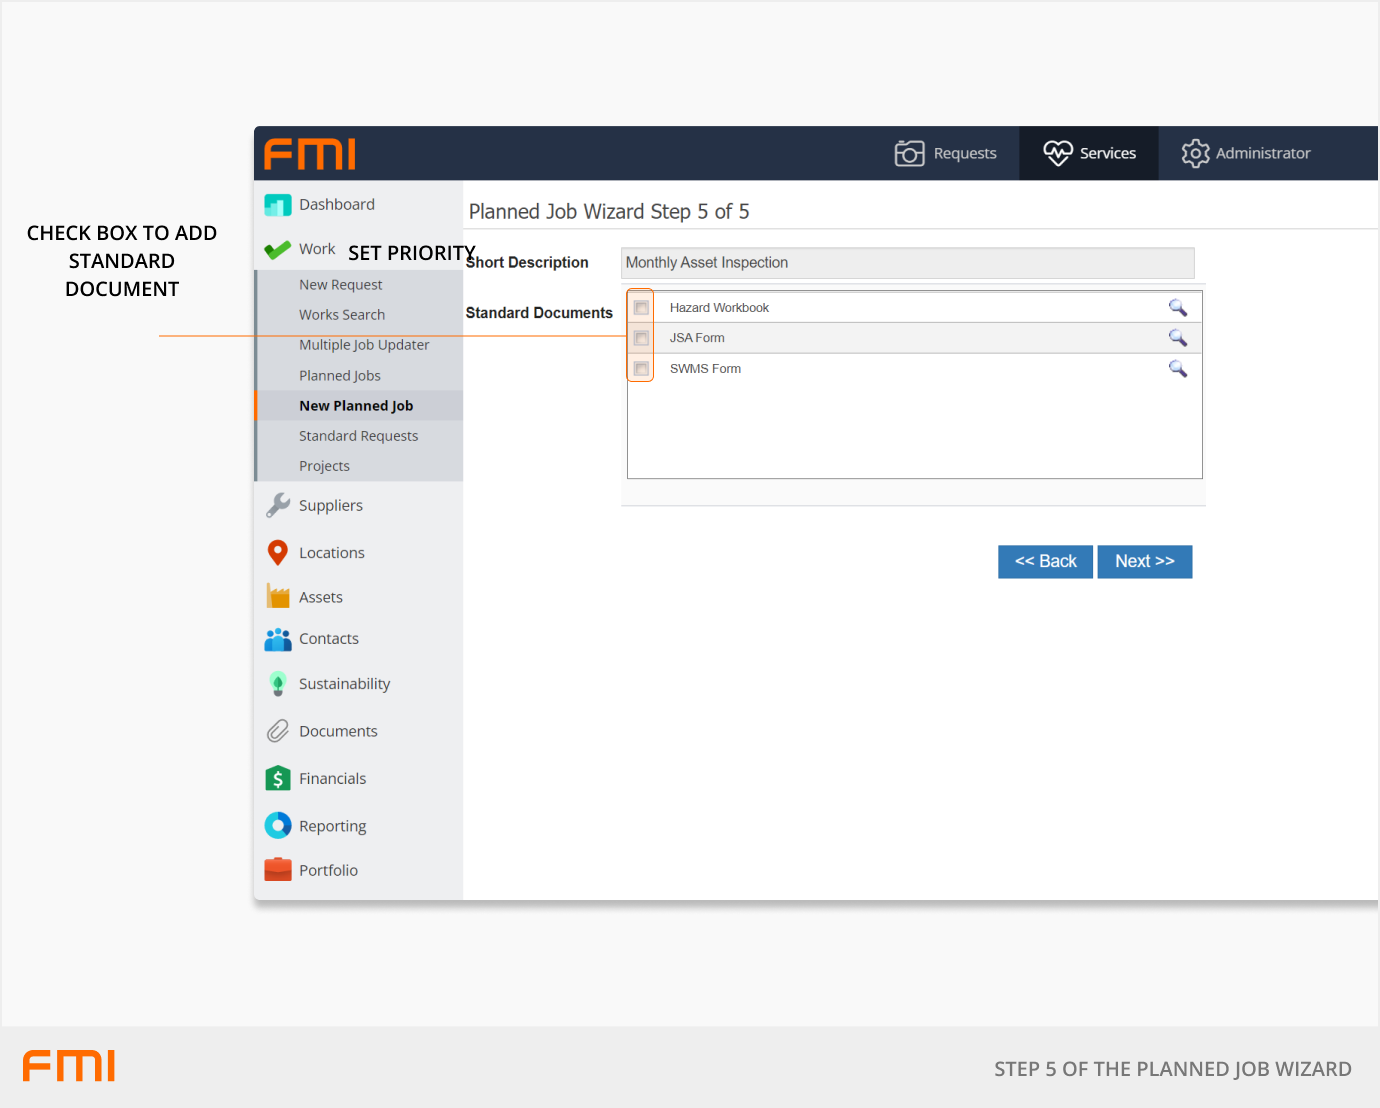
Select the Standard Documents that are needed to be attached to all Planned Jobs generated into the future.
Select Next to progress to the next screen.
Final review
The review screen will display what you have set up in steps 1-5 of the Planned Job Wizard.
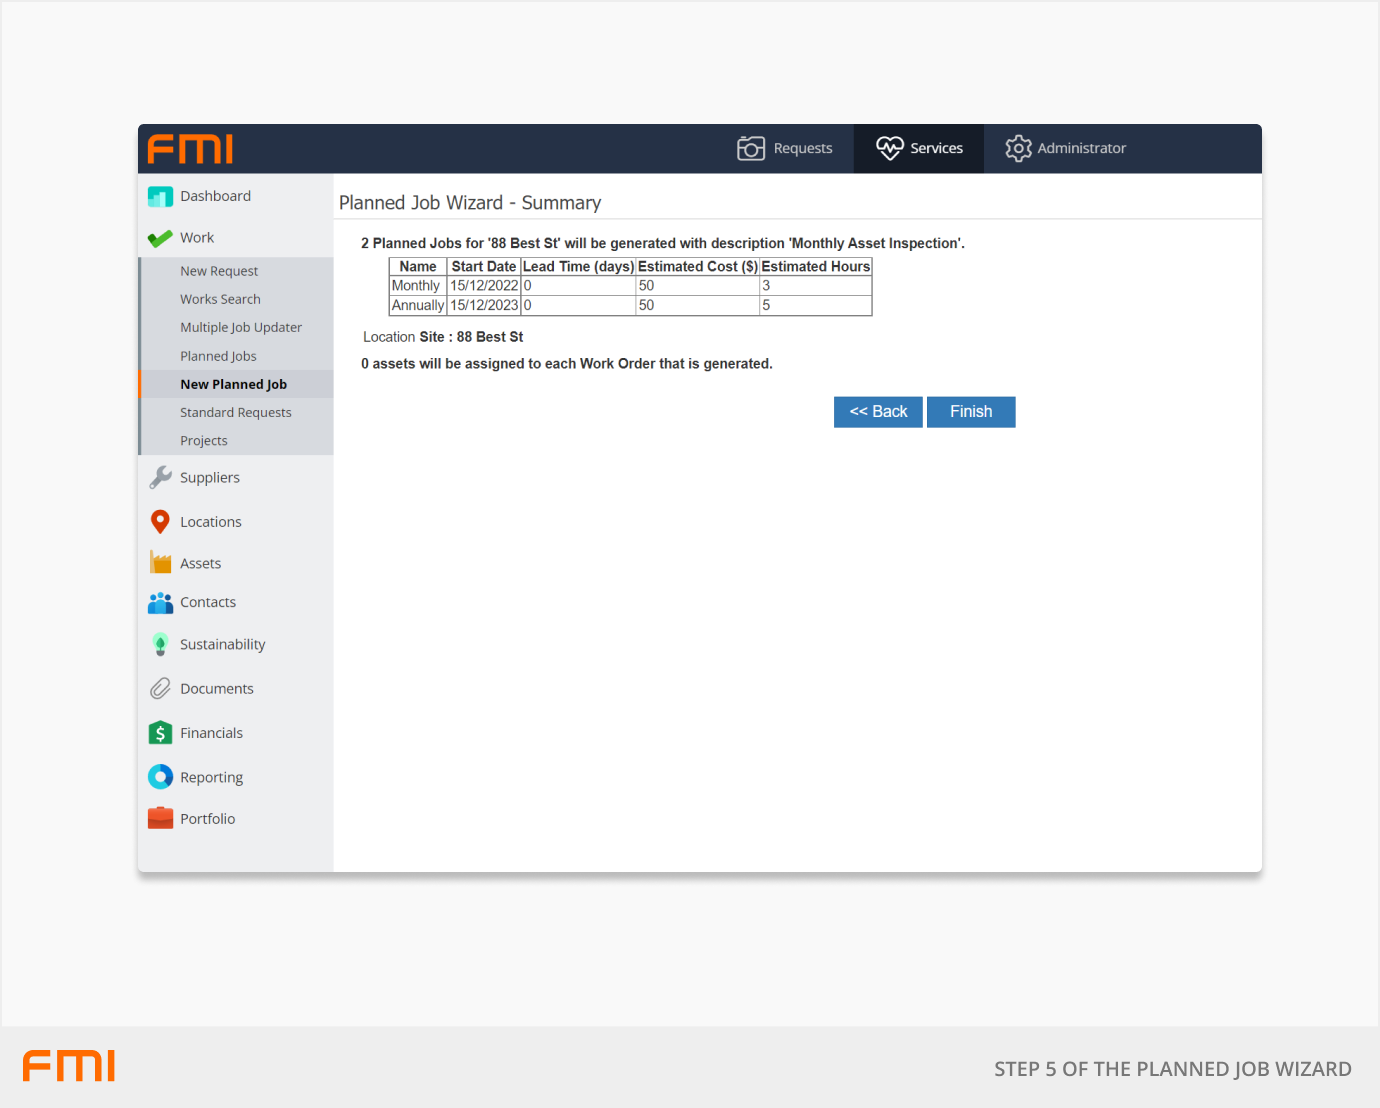
Options
- If incorrect, select Back and make the adjustments.
- When correct, select Finish to save the Planned Job.
The setup of the Planned Job is now complete.
More information
For an overview of Planned Jobs, see Getting Started with Planned Maintenance.