This article is for FMI Works users who have been given the permission of Works Manager
Overview
Scheduled reports are useful for providing regular updates to users.
All reports can be automated to send via email to desired recipients at a scheduled frequency.
Some common uses for this functionality are:
- Regular management reporting.
- Providing regional or area managers with an update on work being raised for sites under their management.
- KPI reports for the FM Manager to review.
- Providing contractors with an update on any outstanding overdue work orders.
- Providing the internal FM team with a report on current work assigned.
- Providing Interested Parties with updates on work relating to a project.
- Reminding users there are pending work orders requiring an update to the Process State.
Tip: Scheduled reports can also be used to save report filter settings for complex reports. By turning off the enable flag, the report will not send automatically. When you are ready to generate the report, turn on the enable flag and schedule the report.
Who can set up scheduled reports?
Users must have the permission of Works Manager to create, view, edit, or delete scheduled reports.
How to set up a scheduled report
From the Services Module, select Reporting > Reports. Select the report and the desired filters and then select Schedule.
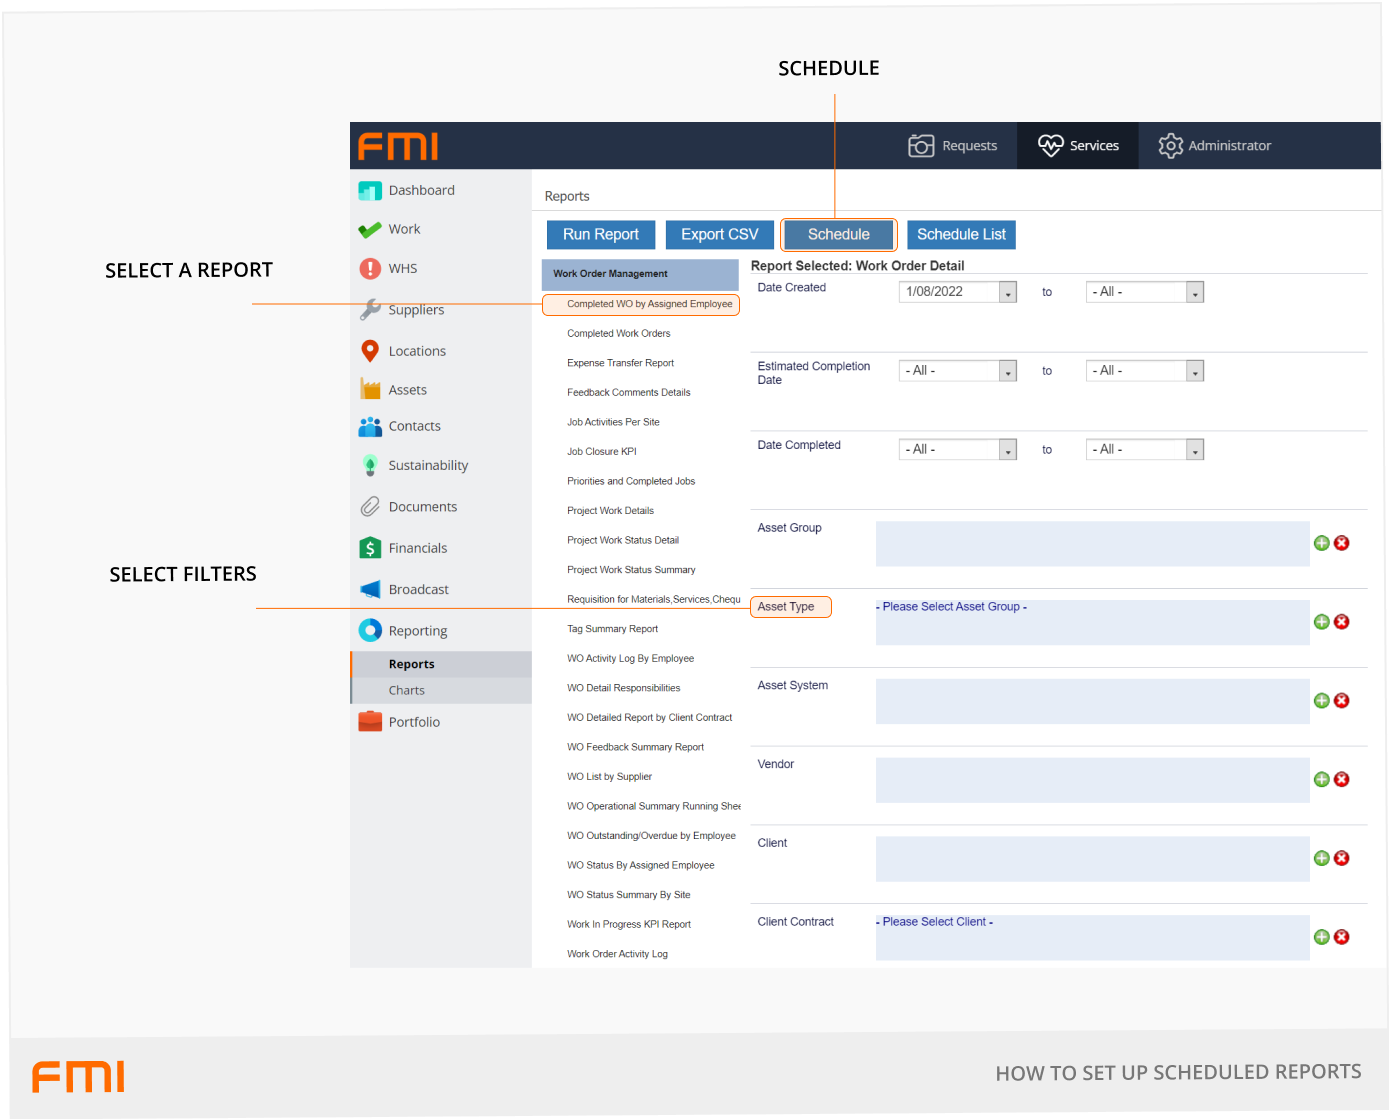
Setting the report filters
Refine your data by selecting from the report filters. Do not select any date ranges at this time; these will be defined when you schedule the report.
Common filter choices include the following:
- Work Order Status
- Employee (for example, the FM manager, internal trade or regional managers)
- Supplier (contractor/vendor)
- Location
- Portfolio (client/client contract/region)
- Process State
- Asset classification (Asset System, Groups and Type)
- Priority
- Service Type and Job Activity
Scheduling the report
Select Schedule at the top of the screen.
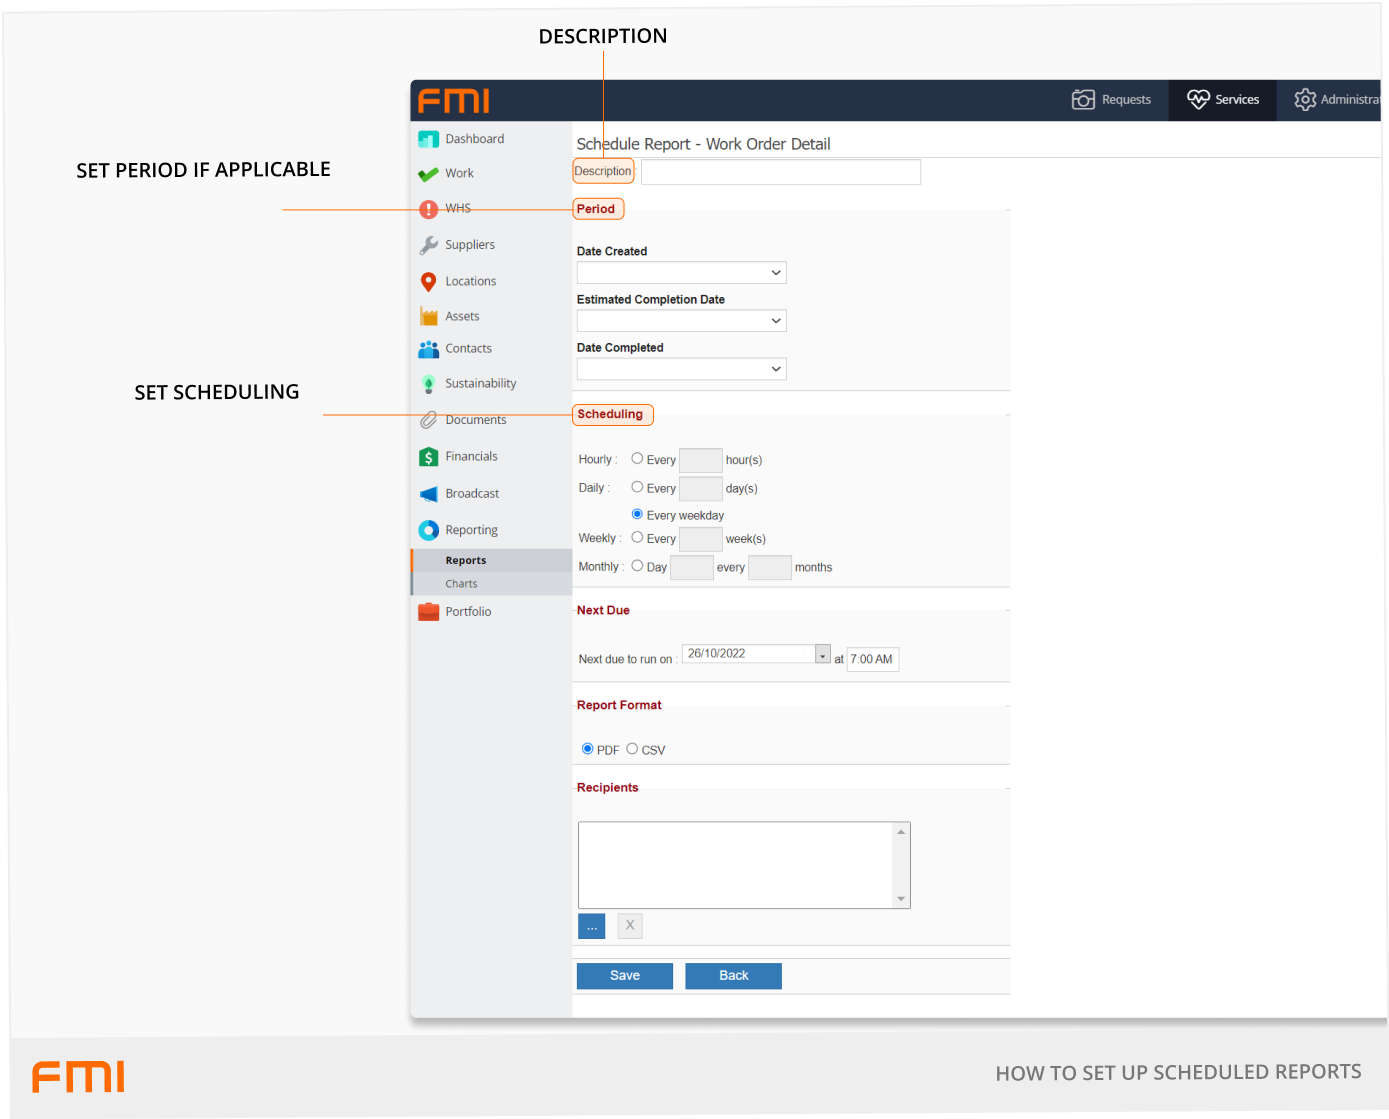
Description
Enter the subject of the report. This will become the email subject heading to which the autogenerated report will be attached.
New Due
Add the starting date and time for your report schedule.
If you are using the Last or Next date parameters, this date will be referenced in choosing the data to reference.
Once the report has run it will automatically update the date. If you are using Other as your date parameter, it will use this date to trigger the frequency of the report.
Period
Define what data should be retrieved, from the following options.
- Estimated Completion Date: the estimated completion date on the work order.
- Date Created: the date the work order was created.
- Date Completed: the completed date on the work order.
Date options
Each date period has several date options.
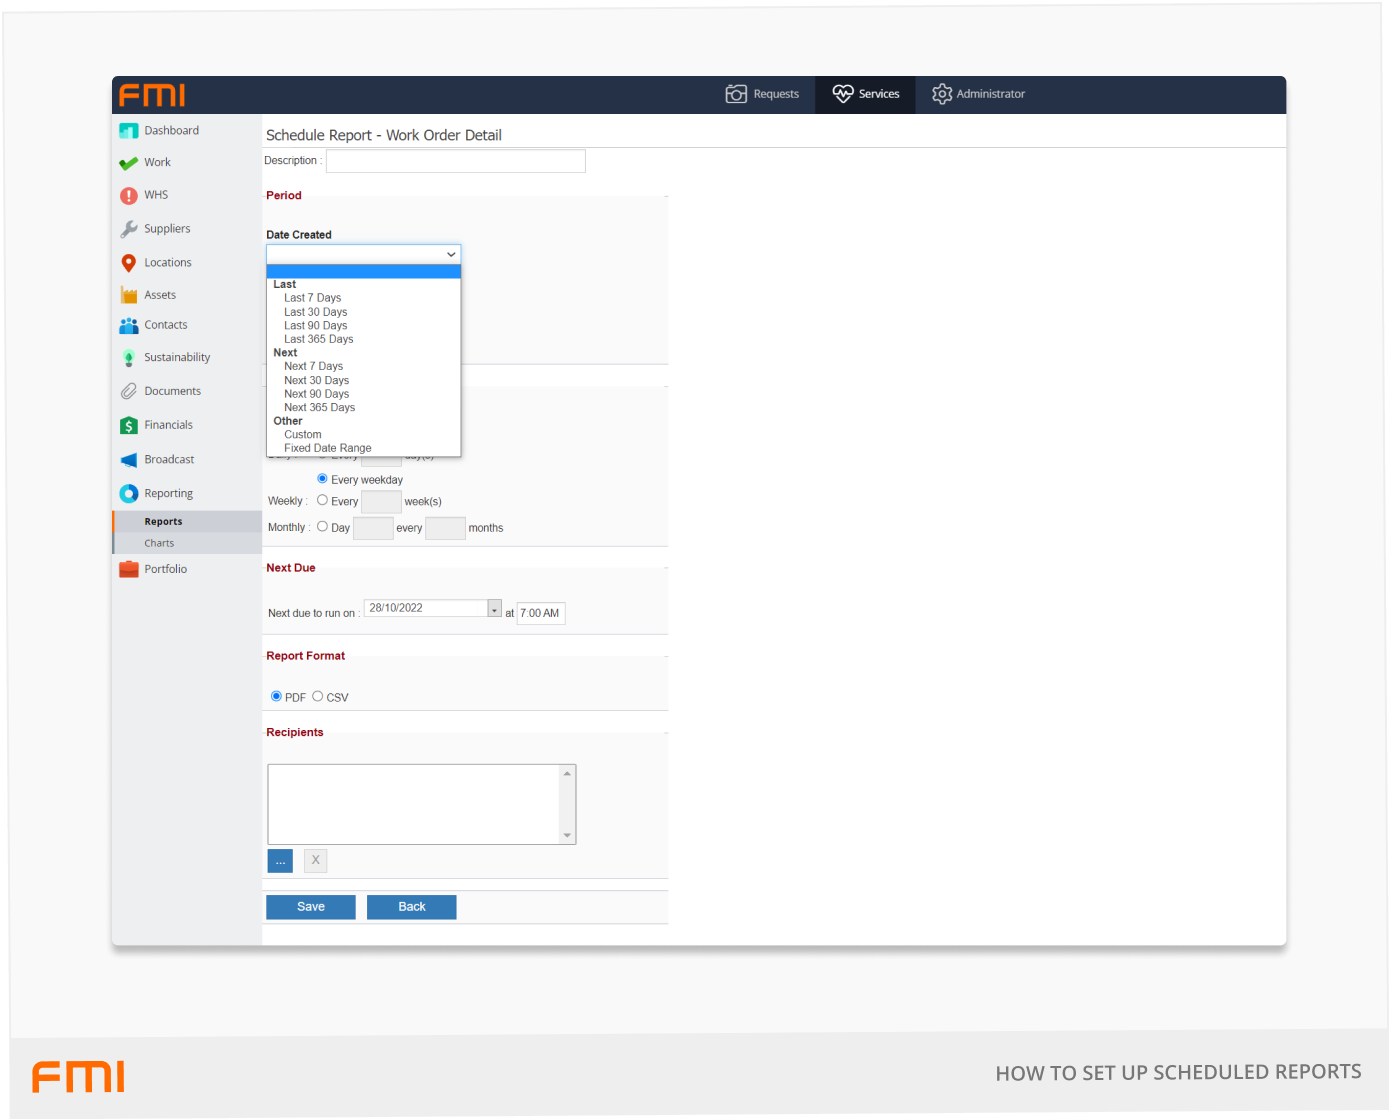
- Last (7, 30, 90, 365 days): used to look back on historical data. For example, overdue work or completed work. Data returned will be x number of days in the past. The number of days is relative to the report schedule date.
- Next: looking into the future. For example, asset replacement or contractor accreditations. Data returned will be x number of days in the future. The number of days is relative to the report schedule date.
- Other > Custom: create your own date range. For example, –120 days (the minus indicates historical data like completed work orders), or 1095 days for an asset replacement report looking into the future for the next 3 years.
- Other > Fixed Date Range: define your own range. For example, using the Budget Site Cost Summary By Month report to report on the calendar year-to-date. Select Fixed Date Range within the Date Invoice Received dropdown. Choose 1st January in the 'From' field and leave the 'To' field blank.
Setting report frequency
Select the frequency of the report.
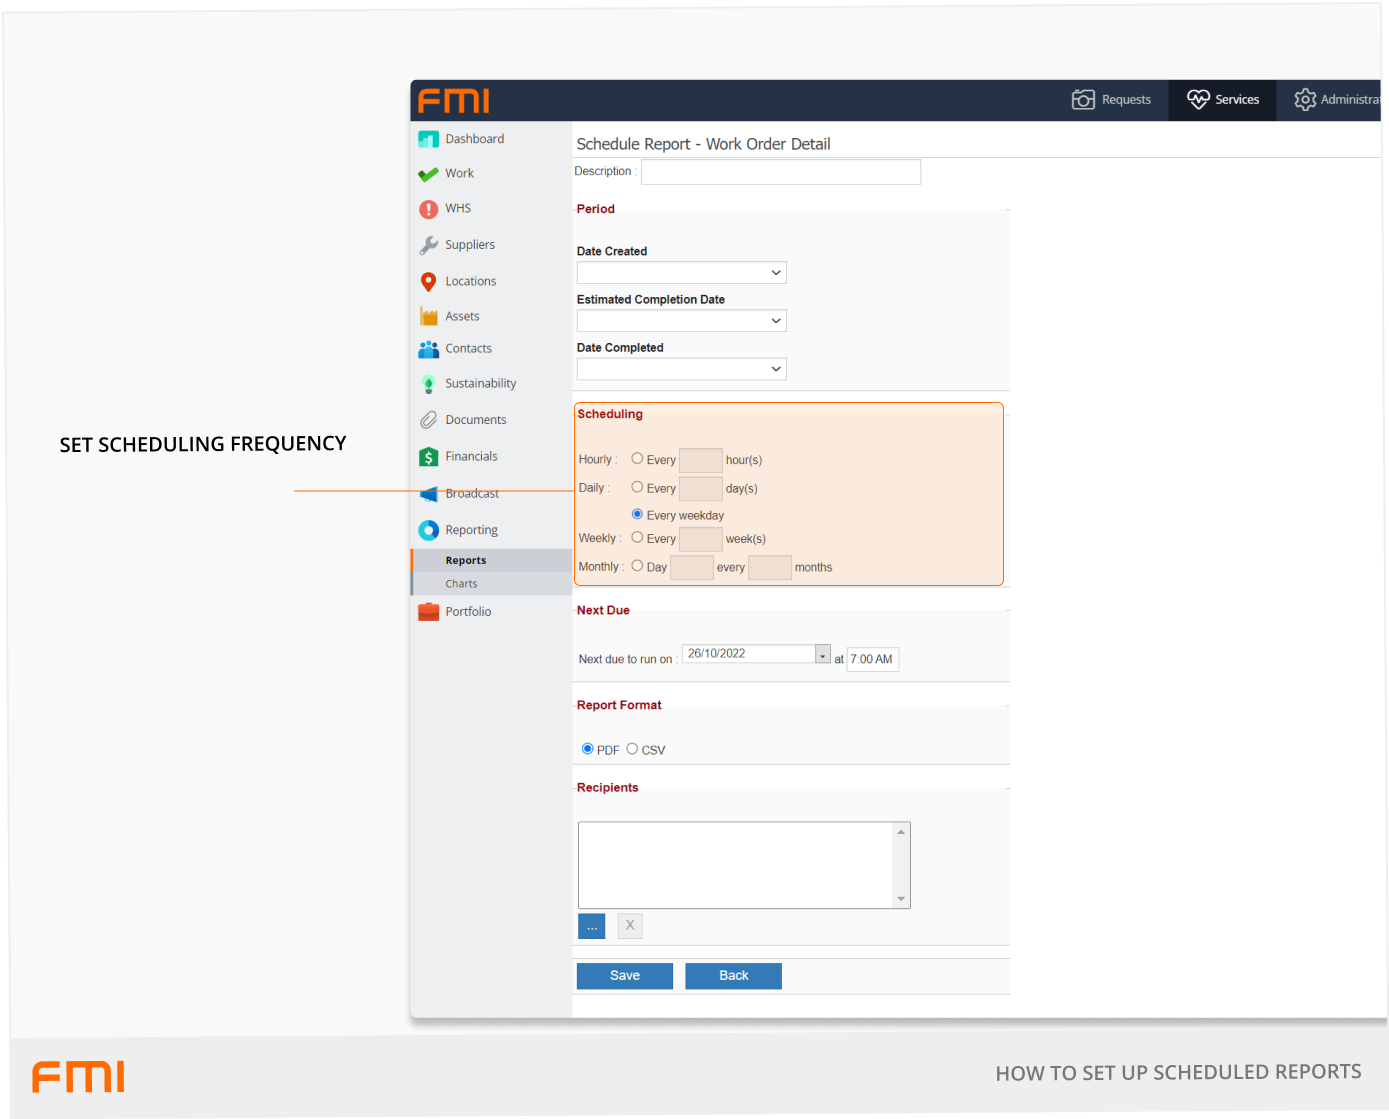
The following frequency options are available.
- Hourly: the report will generate every x number of hours.
- Daily: the report will generate every x number of days.
- Every Weekday: the report will generate every weekday.
- Weekly: the report will generate every x number of weeks.
- Monthly: the report will generate every x number of months on a set day.
Selecting a scheduled time

The Next Due date and time indicates when the next report will be generated.
Note: Scheduled reports will run using UTC time. When scheduling report times, they should be converted from your local time to UTC time.
Use the following to convert your desired report time to UTC.
- ACST: subtract 9.5 hours.
- AEDT: subtract 11 hours.
- AEST: subtract 10 hours.
- AWDT: subtract 9 hours.
- AWST: subtract 8 hours.
- NZDT: subtract 13 hours.
- NZST: subtract 12 hours.
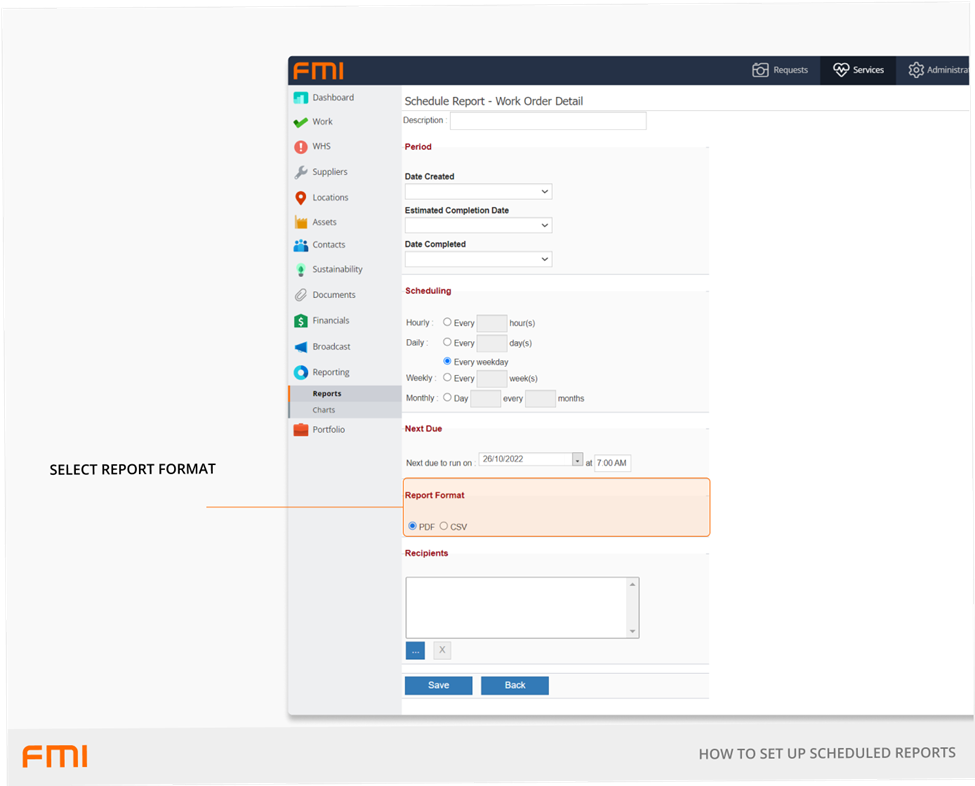
Report Format
There are two types of report format available: PDF or CSV (opens in Excel).
Adding recipients
In Recipients, select the contact/s who will receive the scheduled report.
Select the Add Contacts button (appears as a blue button with three dots) to go to Select Contacts.
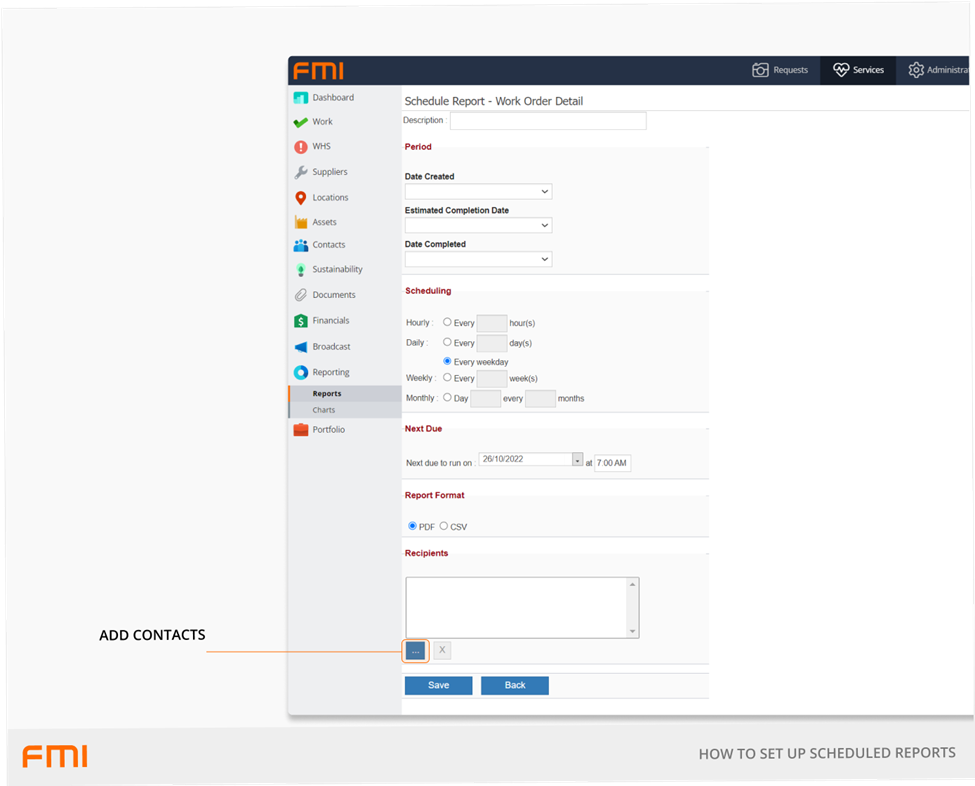
From here you can search for any contact in FMI Works who you want to receive the scheduled report. Use the Site and Name filters to help find the desired contact. Recipients can be internal users, Interested Parties, and/or suppliers/contractors.